Printable Documentation
Installation
Download your preferred version from the Itch.io download page or the older releases page.
Windows
Two versions of GB Studio are available for Windows. The Squirrel Installer version just requires you to unzip, double click and then wait a few seconds while the application installs to your C:\ drive. Once installed a shortcut will be added to your desktop automatically and the application will start. The application will be installed to %LocalAppData%\gb_studio, if you need to install to a different location use the Manual version.
The Manual version is a zip containing the application files, you can unzip this to any location. Once unzipped double click gb-studio.exe to start.
macOS
For macOS unzip the downloaded file and move GB Studio.app to your Applications folder. Double click to start.
If you're having trouble building or running your game you may also need to install Apple's Command Line Tools by opening Applications/Terminal.app and entering the following command.
xcode-select --install
Ubuntu / Debian-based Linux
For Debian-based Linux distros, download the .deb version and run the following commands (Tested on Ubuntu 18.10)
> sudo apt-get update
> sudo apt-get install build-essential
> sudo dpkg -i gb-studio_1.0.0_amd64.deb
> gb-studio
Fedora / RPM-based Linux
For RPM-based Linux distros, download the .rpm version and run the following commands (Tested on Fedora 29)
> sudo yum install libXScrnSaver make lsb
> sudo rpm --ignoreos -i gb-studio-1.0.0.x86_64.rpm
> gb-studio
Getting Started
When you first open GB Studio you will see the New Project window.

If you have an existing project you can open it from here by clicking Open and navigating to the .gbsproj file.
New Project
Give your project a name to get started (don't worry, you can change this later) and choose a project template. If you're new to GB Studio then I would recommend using the Sample Project template which contains a few example scenes and scripts already set up so you can get a small idea of what's possible. Click Create Project and you'll be taken to the Project Editor.

As soon as you see this screen you can click the Play button in the top right which will just take a few seconds to run the project. After playing the sample project you can try clicking around the editor to see how the project is set up. Select one of the people or signposts and edit the their dialogue using the sidebar on the right then try running the project again, you've just made your very own version of the game! Don't worry if you break anything, you can always make a new project with the sample template later.
Keyboard Shortcuts
Play Window
When playing your game inside GB Studio use the following keyboard controls:
Up - Up Arrow / W
Down - Down Arrow / S
Left - Left Arrow / A
Right - Right Arrow / D
A - Alt / Z / J
B - Ctrl / K / X
Start - Enter
Select - Shift
New in 1.2.0
You can also control the Play Window using a supported gamepad. If your web browser has gamepad support you can also use it when running a web build.
Navigating The Menus
Much of the functionality of GB Studio is accessible through the menu bar and many of the menu items contain keyboard shortcut labels. Try clicking around on the menus to discover all of the shortcuts but the following are a few you should find useful:
Save Project - Ctrl/Cmd + S
Open Project - Ctrl/Cmd + O
Switch View Mode - Ctrl/Cmd + 1-8
Run Game - Ctrl/Cmd + B
Export ROM file - Ctrl/Cmd + Shift + B
Game World
While editing the game world you can use the following keys to quickly manipulate your scenes.
Select Mode - V
Add Actor - A
Add Trigger - T
Add Scene - S
Eraser Mode - E
Collisions Mode - C
Set Player Start Position - P (while hovering over desired location)
Drawing Mode
New in 2.0.0
Drawing mode is automatically enabled in the Collision tool and the Colorize tool.
Draw - Click on scene
Draw line from last point - Click to set first point, hold shift, click to set next point
Lock brush to axis - Hold Shift + Hold Click
8px Brush - 8
16px Brush - 9
Fill - 0
Hide Triggers/Actors - -
Collision Types
These are only availible when using the Collision tool.
Each tile can hold a maximum of 1 ladder and 3 collision sides. Ladders will not replace existing collision when placed on top of other colliders.
Select multiple collision types - Shift + Click
Erase collision tile - Click on a collision tile
Solid - 1
Collision Top - 2
Collision Bottom - 3
Collision Left - 4
Collision Right - 5
Ladder (Platformer only) - 6
Colorize Palettes
These are only availible when using the Colorize tool.
Change Brush Palette - 1-6
Change Palettes - Hold click on existing palette
Saving and Loading
Saving
To save your project select File > Save from the menu or press Ctrl/Cmd + S. If you try to close a project with unsaved changes GB Studio will warn you giving you a chance to save your project first. On macOS any unsaved changes in your project will be represented by a dot in the window close button.
Loading
To load your project again, either use the Open button on the New Project window or select File > Open from the menu and navigate to your project's folder then select the .gbsproj file.
Version Control
The project folder layout and .gbsproj file is designed to work well with version control systems such as Git with each change by the application taking place on a new line in the data file allowing history to be tracked easily. If you want to use version control on your project you can just create the repository at the project root folder.
It's recommended to ignore the build folder from your repository using a .gitignore file or similar.
Backups
Each time you save your project the previous version is saved to your project folder with the extension .gbsproj.bak. If you ever wish to roll back to the previous version in your project you can rename this file to have the extension .gbsproj and open this file instead.
The Project Editor
The default view for the Project Editor as shown below is the Game World. This is where you can create your game by combining scenes, adding actors and triggers then building scripting events to add interactions.

Use the Editor Tools to switch between Select, Add, Erase, Collision, and Color Drawing modes.
By default, your project's properties are shown in the Editor Sidebar on the right. Here you can set the project name and choose the starting scene. This project view is also where initial values for the Player actor are set. See the page on The Player for more information on the Player.
To look at project properties again from the Editor Sidebar, click on any empty space between scenes.
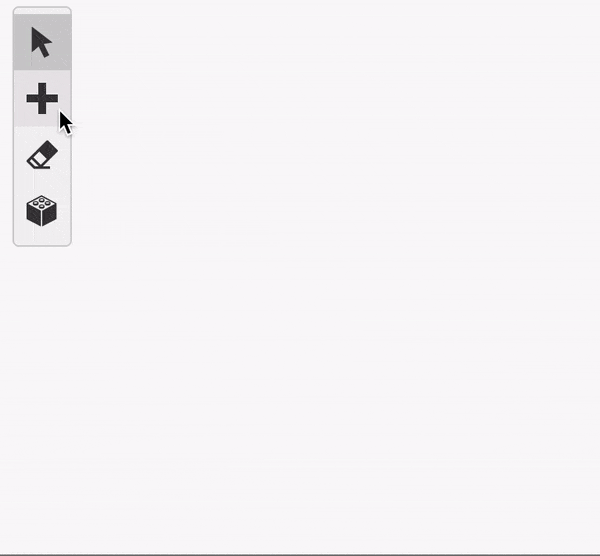
Editor Tools
Select tool: Clicking any scenes, actors, or triggers will update the Editor Sidebar to show the properties and scripts for the item you selected. You can switch back to the Project's properties by clicking outside of a scene.
Add tool: You are given the choice of adding a new Actor, Trigger or Scene. After clicking any of the 3 options, your mouse cursor will be loaded with a new item. You can place the new item by clicking inside the Project Editor, and cancel the action by pressing Escape or selecting another tool from Editor Tools.
Erase tool: All collisions, actors, and triggers will be removed when clicked. Scenes are not affected by Erase mode. To delete a scene, use Select mode and click the scene's background. In the Editor Sidebar click the down arrow at the top to reveal the “Delete Scene” button. All erase actions can be undone by pressing Control Z.
Collision tool: Allows you to add collisions to any type of scene using GB Studio's Drawing mode.
Colorize tool: Allows each tile to be given a different palette to use in place of GB Studio's default palette. The Colorize tool also uses GB Studio's Drawing mode. The palettes used here are determined in the Palette tab in the Project Editor.
See the documentation on Keyboard Shortcuts for editor tool shortcuts.
The Asset Viewer
You can search and preview all the assets in your game by using the Project Navigator‘s drop-down list. Selecting Sprites, Backgrounds, UI Elements or Music will bring up the asset viewer for each type of asset.

The ? button will bring up the documentation page for that type of asset.
The searchbar will narrow down the list of assets to a specific file.
Pressing Edit will open the selected file using your system's default app setting.
As with any window in GB Studio, your project assets folder can be opened with the folder button on the top right.
See the documentation on Assets for more information on how to add new assets.
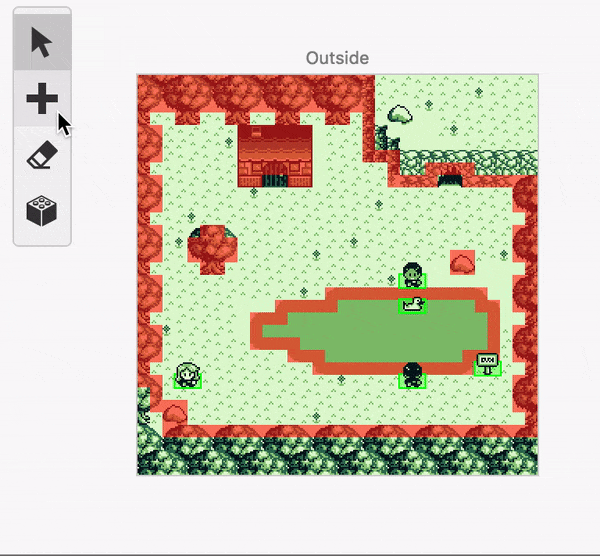
Scenes
A scene is a single screen of your game, it can contain multiple actors and triggers. A game is typically made-up of many scenes connected together with triggers using the Change Scene event.
Adding a Scene
Click the + button in the Editor Tools and select Scene from the menu. Click on any empty space in the Project Viewport to place the new scene.
You can use the Editor Sidebar to give your scene a name and a background from your project's assets. See the documentation for Backgrounds for more information on adding background images.
Scene Properties
- Name - Names your scene. Useful for locating your scene with the search bar.
- Type - Lets you choose from the list of gamemodes. A scene's type cannot be changed in-game.
- Background - Lets you choose a background from the
assets/backgroundsfolder. - Add Notes - Adds an editor-only text field to your scene.
Navigation
Navigation is a list that shows every Actor and Trigger inside the scene. Clicking any name in the list will select that object and show its properties in the Editor Sidebar.
Scripting
To start building a script, select a scene and click the Add Event button in the Editor Sidebar to open the event menu. Select an event to add it to the script.
For more information see the documentation for Scripting.
Adding Collision to a Scene
Select the Collision Tool from the Editor Tools. There are 6 collision types that can be added.
Solid Collision stops colliding actors from entering the tile on any side.
Top/Bottom/Left/Right collision stops colliding actors from entering the tile from that specific side. This is useful for one-way collision and semi-solid platforms.
Each tile can hold a maximum of 1 ladder and 3 collision sides. Adding 4 collision sides will replace the sides with a single solid block. Ladders will not replace existing collision when placed on top of other collision.
Colorizing a Scene
Select the Colorizer Tool from the Editor Tools. There are 6 palettes types that can be added to a scene with Color Mode enabled. Palettes can be adjusted in Settings.
The palettes used in the Colorizer Tool can be swapped out for existing palettes (such as the UI palette) by long-clicking on a palette.
For more information about the drawing mode used for the Colorize Tool and the Collision Tool, see Keyboard Shortcuts.
Scene Limits
There are several limits that GB Studio has put in place to keep game performance consistent, and to minimize visual bugs.
Each scene can have a maxmimum of 30 actors, 25 unique actor sprite frames, and 30 triggers. You can check this information by selecting a scene and looking for the gray bar under your scene that reads: A: 0/30 F: 0/25 T: 0/30. The letters on this bar represent the following:
A:represents the number of actors that the scene is using.F:represents the number of unique frames that each actor is using in their sprite sheet.T:represents the number of triggers that the scene isusing.
Actor Limits
Each scene can have a maximum of 30 actors. Ideally, there should never be more than 10 actors within a 20 x 18 tile boundary, equivalent to 160px x 144px. Clustering more than 10 actors together in a scene will cause some actors to become invisible in-game. GB Studio will warn you if it thinks this will be the case for a scene:
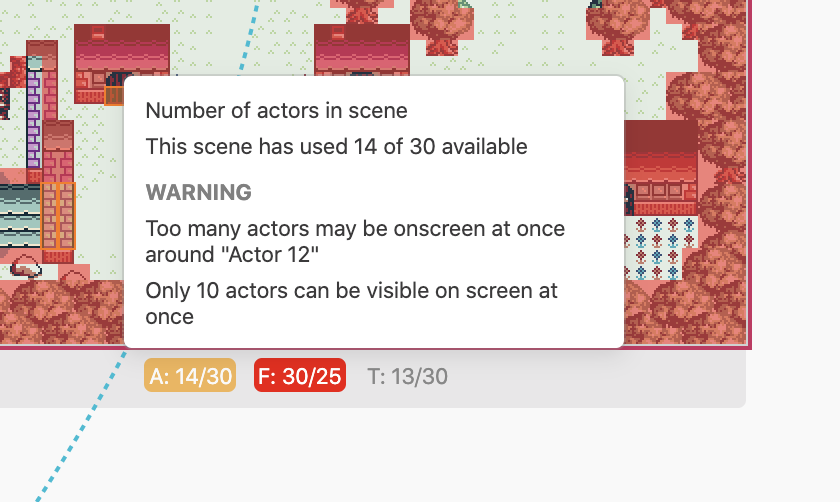
You can address this message by moving or deleting actors so no more than 10 will be seen in a 20 x 18 tile boundary. You can use the Eraser Tool to delete actors. Actors will still become invisible if more than 10 actors move into the screenspace after the scene starts.
Frame Limits
Each scene can have a maximum of 25 unique sprite frames. Read more about frame limits on the Actors page.
Trigger Limits
Each scene can have a maximum of 30 triggers. Each trigger has its collision checked actively during gameplay, even when it's not being touched. Performance issues start to arise above 30 triggers. You can use the Eraser Tool to delete triggers.
The Player
Start Position
The player starting position is indicated in the game world view by the  icon.
icon.
Clicking in the background between scenes switches the sidebar back to the Project Editor where you'll have options to set the player starting scene, position, direction and sprite sheet.
You can also change the player start position by dragging the icon and can even drag between scenes.
Scripting
Most actor script events can also be applied to the player. In addition you can use Set Player Sprite Sheet event to change the graphics used for the player character mid-game. Changing the sprite sheet will persist between scenes so remember to switch the sprite back if it was supposed to be temporary.
When switching between scenes the player will always become visible at the scene start location regardless of previous visibility options. if you want the player to be hidden on a scene e.g when showing a title screen or cutscene add a Player Hide event to the scene's On Init script.
Actors
Actors are the characters and objects in your scene that you can interact with.
Adding an Actor
To add an actor to a scene click the + button in the Editor Tools and select Actor from the menu (alternatively press the A key), then click on the scene and position where you wish to place the actor.
Setting a Sprite
To add a sprite sheet to your actor, select your actor, and locate the drop-down menu for “Sprite Sheet” in the Editor Sidebar.
To learn more about the different types of Sprites you can add to your actor, see the Sprites page.
Actor Properties
Once an actor has been selected, the Editor Sidebar will show the actor's properties.
General Properties
These are properties that apply to all actors:
- Name
- X and Y (Position)
- Sprite Sheet
- Pin to Screen
- Collision Group
- Add Notes
- Navigation
- Scripts
Name
Giving your actors a name helps organize them in your project. An actor's name will be visible in any drop-down menu that asks you to pick an actor, such as the Actor: Hide event.
Position
Your actor's Position or X and Y let you set the actor's starting position on the screen.
X starts at zero from the left side of the scene and increases as your actor goes right.
Y starts at zero from the top of the scene and increases as your actor goes down.
You can also click and drag an actor around with your mouse to move it.
Sprite Sheet
The Sprite Sheet property lets you change the look of your actor. Read more about the different sprite sheet types on the Sprites page.
Pin to Screen
When an actor is pinned, the actor will not move without a script, and does not create collisions with other actors in your scene.
Enabling this property will temporarily change your scene to be blacked-out, with a 160px x 144px boundary in the top-left corner showing part of your original scene. Use your mouse to drag the actor to where you want it to be pinned to the screen.
Select a different actor, the scene, or the project to return the blacked-out view of your scene to normal.
Collision Groups
Actors can be given a collision group in the Editor Sidebar. When enabled, the option to run scripts based on collisions will appear in the Editor Sidebar. To learn more about On Hit scripts, see the documentation for Scripting.
Movement and Animation Properties
The following properties change your actor's animation and world-interaction logic:
- Movement Speed
- Movement Type (for actor sprite sheets)
- Animation Speed (for all animated sprites)
- Animate while stationary / Animate by cycling frames
- Initial Frame
- Direction (for actor sprite sheets)
- Sprite Type (for all animated sprites)
Movement Speed changes how fast an actor moves. The speed can be changed from Speed 1/2 (Slower) to Speed 4 (Faster). A static actor can still be moved using scripted events.
Most of the properties here are only available to some actors, depending on the type of sprite sheet they use. There are four types of sprite sheets:
Static Sprites have 1 frame of animation. This is the only non-animated sprite sheet type.
Animated Sprites have anywhere from 2 to 25 frames of animation. No directions are associated with its frames.
Actor Sprite Sheets have 3 frames of animation: One to face up, one to face down, and one for facing right.
Animated Actor Sprite Sheets have 6 frames of animation, adding a 2nd frame to each direction of a regular Actor Sprite Sheet.
You can read more about adding a specific type of sprite sheet on the Sprites page.
Movement Types
The Movement Type property lets you change how an actor moves. The one you should use depends on how you want the actor to behave when the player walks around the scene and interacts with it. There are 4 movement types:
- Static - The actor faces the same direction and stays in the same spot, unless it is told to move with Scripting Events.
Useful for things like signposts or other stationary objects. - Face Interaction - The actor faces you when you interact with it. It does not move at random.
Useful for simple characters to make them more responsive to the player's actions. - Random Rotation - The actor will start in the initial direction but will randomly change direction at set intervals.
Useful to show characters who are looking around their surroundings. - Random Movement - The actor will randomly change direction and move around the scene at set intervals.
Useful for characters who are searching an area. Actors can block the player's movement.
Animation Speed
Animation speed changes how fast an animation is played back, from Speed 0 (Slower) to Speed 4 (Faster). Animation speed can also be set to “None” to prevent an actor from animating at all, even if they would normally animate from walking or changing direction.
Animate while stationary / Animate by cycling frames
These two properties are checkboxes that appear in the same place. Your actor will animate on its own when this property is enabled.
For animated actor sprite sheets, “Animate while stationary” will play the two frames of the current direction they're facing. This creates a “running in place” effect.
For other animated actors, “Animate by cycling frames” will run through its sprite sheet in a loop. The Animation Speed property becomes visible on the Editor Sidebar when this property is enabled.
Direction
Direction changes the starting direction of an actor. This is only available to actors with actor-type sprite sheets.
Sprite Type
The actor's Sprite Type property is a way to override the sprite sheet type without changing the sprite sheet asset itself. The current options for sprite type are:
- Static
- Actor
Note If the actor uses a static sprite sheet (containing only a single frame of animation) then the only movement type available will be static, and the menus for choosing the movement type and initial direction won't appear.
Initial Frame
This is the starting frame of an actor's animation, or the frame to display on a static actor.
Other Properties
Add Notes lets you write notes. These notes are only visible in GB Studio's Editor Sidebar and can't be read in-game. This is identical to adding notes to scenes, triggers, and the project itself.
Navigation will show you the scene that your actor belongs to.
Scripting lets you make your actor respond to interactions with scripted events. To learn about how to script your actor, see the documentation for Scripting.
Limits
There are limits to how actors and their sprites can be used in GB Studio. These limits are to make sure your game appears as intended, as well as to keep your actor logic running smoothly.
Actor Limits
A maximum of 30 actors can be added to a scene. However, there can only be 10 actors visible on-screen at once. The screen space is defined as a 20 x 18 tile boundary, equivalent to 160px x 144px. Read more about Actor Limits on the Scenes page.
Frame Limits
Due to hardware limitations only 25 unique frames of animation can be allocated to actors in each scene. The limit on unique sprite frames is shared between all actors. When a scene has actors that use more than 25 unique sprite frames, some actors and UI elements may appear glitchy.
To stay under the 25 unique frame limit, use static or non animated sprite sheets when possible. You can also reuse the same sprite for multiple actors in the scene - reusing the same sprite sheet will not count towards the scene frame total.
Triggers
Triggers are areas in a scene that, when the player walks over them, will cause a script to play. They are useful for creating doorways between scenes and to start cutscenes when the player moves to a specific position.
Adding a Trigger
To add a trigger to a scene click the + button button in the Editor Tools and select Trigger from the menu (alternatively press the T key), then click and drag across the scene where you wish to place the trigger setting the desired width and height.

The Editor Sidebar will switch to show the trigger settings where you can give the trigger a name for easier navigation later, reposition and scale the trigger and create the script that will play when the player walks on the trigger.
Scripting
When the trigger is selected click the Add Event button in the Editor Sidebar to open the event menu and start building the script. For more information see the documentation for Scripting.
Scripting Events
Scripting events allow you to control parts of your game based on interactions from the player. They can be used to connect scenes together, change variables, give dialogue to characters, and more.
Scripts can be added to scenes, actors, or triggers. Selecting one of these objects will update the World Editor to show the script of the selected object in the Editor Sidebar.
To start building a script, select an object and click the Add Event button in the Editor Sidebar to open the event menu. Select an event to add it to the script. The topmost event is the first event to be run for that script.
Adding Events
After clicking the Add Event button, a menu will appear to choose the event to add. If you start typing you can filter this list or you can scroll through it to find what you're looking for. Click an event or press the Enter key to add the highlighted event to your script.
To copy an event, click the down arrow next to an event. All scripts have this same down arrow for copying/pasting. Clicking the down arrow on another event allows you to paste the clipboard event either before or after the selected one. You also have the option to paste the values from the first event into the second.
As a shortcut for pasting, you can press the Alt key to turn all Add Event buttons into Paste Event buttons.
Types of Scripts
There are multiple script tabs to choose from the Editor Sidebar depending on which object you have currently selected.
Scene Scripts
These scripts can be accessed in the Editor Sidebar by selecting a scene in your project.
On Init
This script will run once at the beginning of the Scene. The Scene On Init script is always run after the On Init script for Actors in the Scene.
On Player Hit
This script runs when the player is hit by an actor belonging to a collision group.
Actor Scripts
These scripts can be accessed in the Editor Sidebar by clicking an Actor in your project or using the Navigation list in each scene.
On Init
This script will run once at the beginning of the Scene. Actors in a Scene will always run their On Init script before their Scene's On Init script.
On Interact
Standing the Player next to an Actor and pressing the A button will cause the Player to “interact” with the Actor. Interacting with an Actor will begin this script. In Shoot ‘Em Up scenes, interacting can additionally be done by colliding with the Actor.
This script is often used for dialogue, using the “Text: Display Dialogue” event.
Enabling a collision group for an actor will convert this script to On Hit: Player, which looks for Player collision rather than Player interaction. This behaviour is identical to On Interact in Shoot ‘Em Up scenes.
On Hit
This script runs when the Actor is hit by another Actor or Projectile belonging to a collision group.
On Update
This script is run once every frame, and can only be added to non-player Actors.
Trigger Scripts
Trigger scripts only have an “On Trigger” script. The player must be inside the trigger to start this script. This is often used for creating doorways between scenes.
Event Glossary
Text Events
-
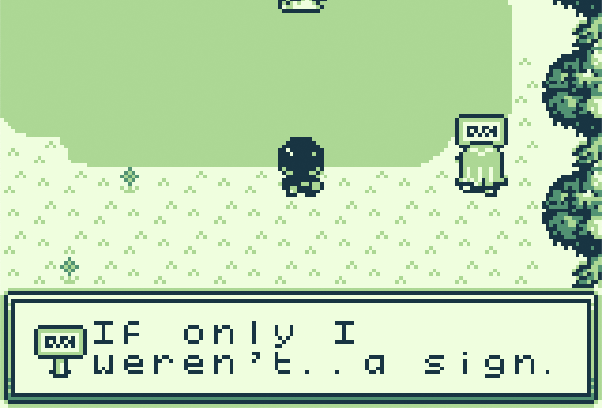
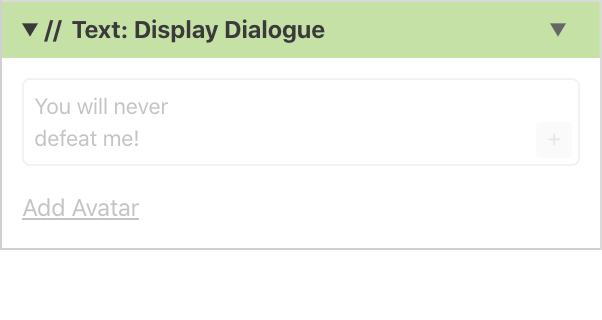
Text: Display Dialogue
Show a dialogue box with up to three lines of text, 18 characters per line (and a total of 52 characters), at the bottom of the game screen. This will likely be the most used script command for interacting with actors in your game.
When text is shown the dialogue box will slide up from the bottom of the screen and will slide down after it has been shown.
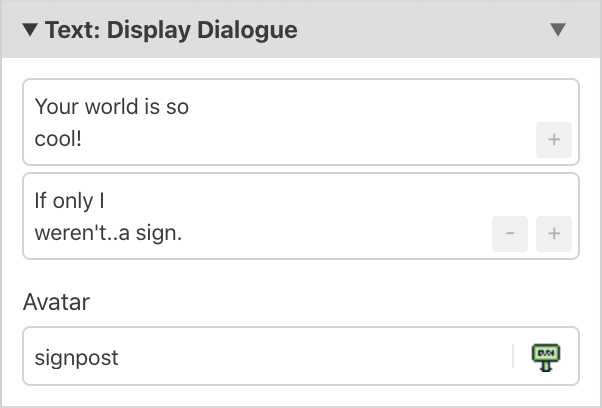
- Using the + button you can create a dialogue sequence which will only close after the last message has been displayed.
New in 1.2.0 - You can display the value of any variables in a text box by using the variable's identifier shown in the variable selector (e.g.
$L0$for local variable 0 and$182$for global variable 182). - You can optionally display an avatar image on the left hand side of the dialogue box by clicking Add Avatar and selecting an image to use. You are able to pick any sprite within your game that contains only a single frame (
16pxx16px). Setting an avatar will reduce the amount of characters per line available to 16 on all lines.
- Using the + button you can create a dialogue sequence which will only close after the last message has been displayed.
-
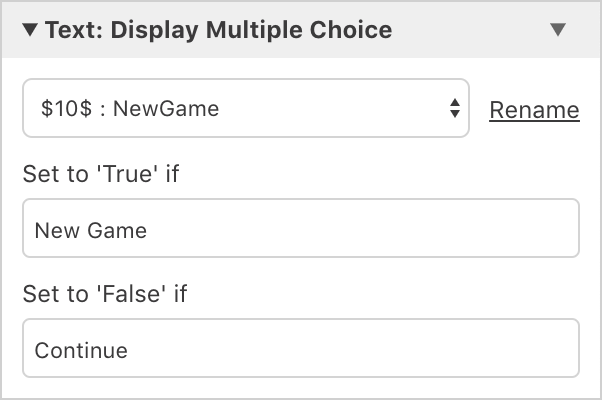
Text: Display Multiple Choice
Present two options to player allowing them to make a choice, will set the specified variable to true if the first option is chosen and to false if the second option is chosen.
-
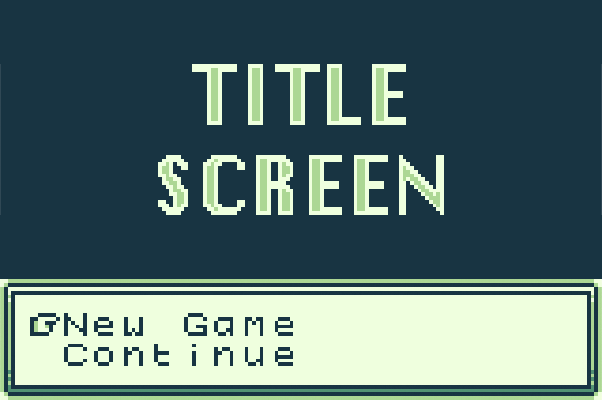
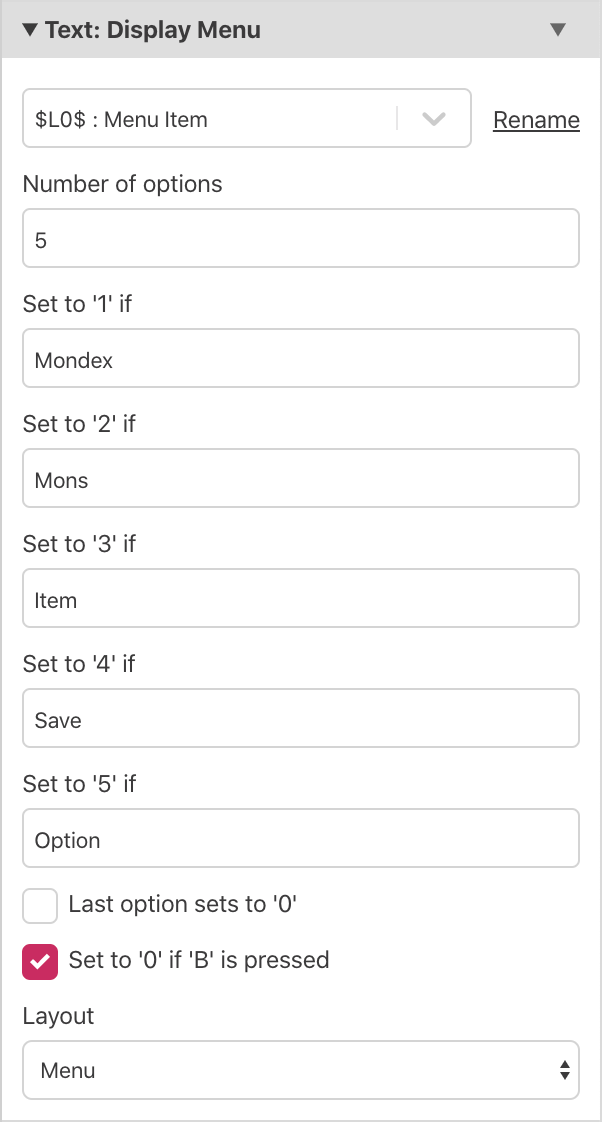
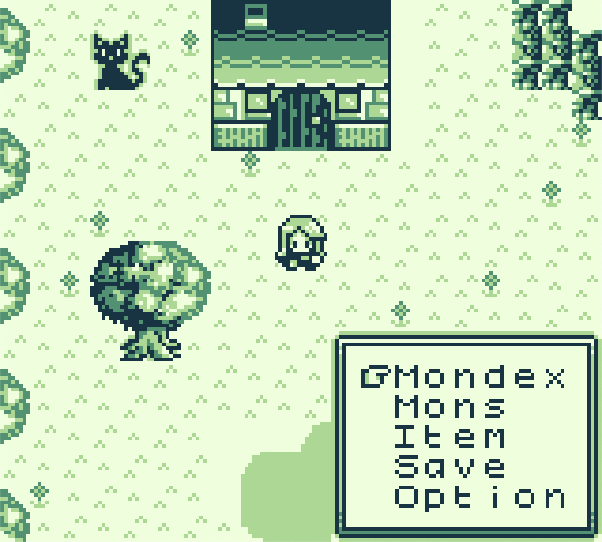
Text: Display Menu
Display a menu of multiple options and set the specified variable to the value of the chosen option. Each menu item has a maximum length of6characters.
Multiple layouts are provided,Menu(shown below) displays as a single column on the right hand side of the game screen andDialoguedisplays a full width dialogue box with two columns. You can optionally set theBbutton to close the menu setting the variable to0and can also make the last menu item return0when selected.
- Text: Set Animation Speed
Set the speed that dialogue boxes appear and disappear and how fast text appears within the box.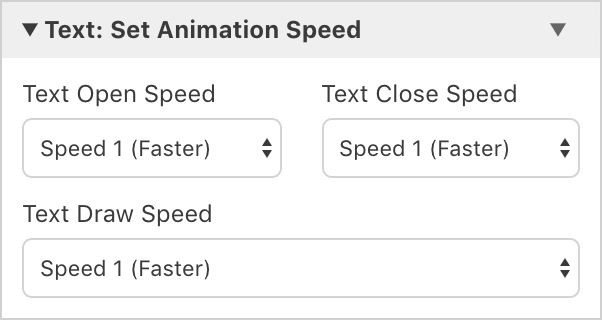
Scene Events
-
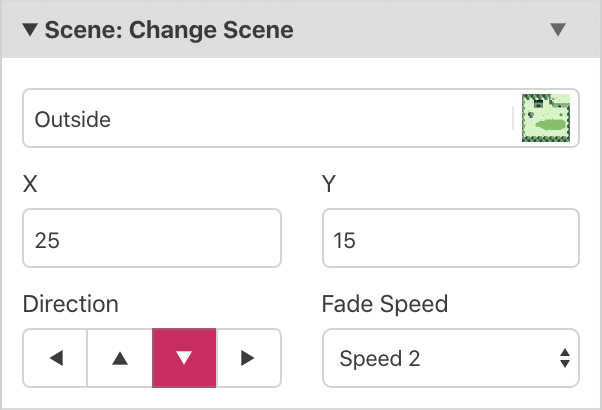
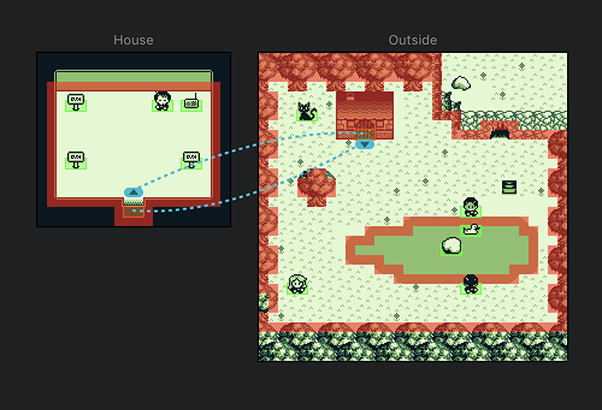
Scene: Change Scene
Transition to a new scene with player at a specified position and direction. A connection line will be drawn between the source of the event and the destination scene with a icon appearing at the destination position. It's possible to drag this icon around and between scenes to modify the event.
-
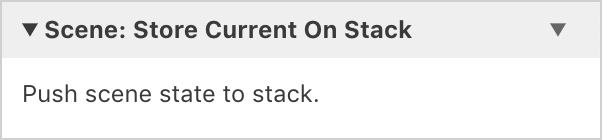
Scene: Store Current On Stack
Store the current scene and player state on to the scene stack, this allows you to return to this exact location later using the Scene Restore events. A common use of this event would be to include in a script just before a Change Scene event to open a menu scene, in the menu scene you could wait for the player to press a close button and then use the Restore Previous From Stack event to return to where the player opened the menu.
-
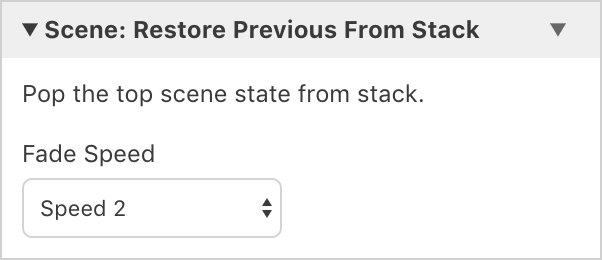
Scene: Restore Previous From Stack
Transition to the last stored scene from the scene stack using the specified fade speed. The previous scene will then be removed from the stack so the next time this event is used it will transition to the scene before that.
-
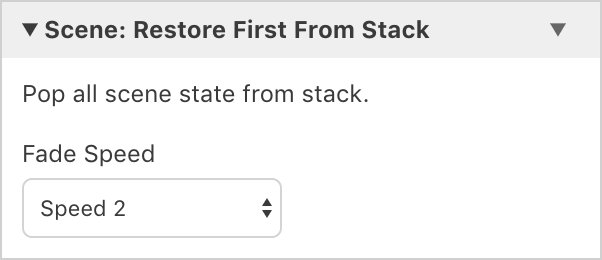
Scene: Restore First From Stack
Transition the very first scene stored on the stack, for instance if you had multiple levels of menu scenes you could use this to imediately return to the game scene. This event will cause the scene stack to become empty.
-
Scene: Empty Scene Stack
Clears the scene stack so that no previous scenes can be restored.
Variable Events
Your game has 512 variables that can be shared across all the scripts in your game. New in 1.2.0 Additionally every Actor, Trigger and Scene has 4 local variables that can only be accessed by that specific entity. Local variables are useful for keeping track of state specific to an entity such as how many times you have spoken to a character or if a treasure chest is open or closed.
-
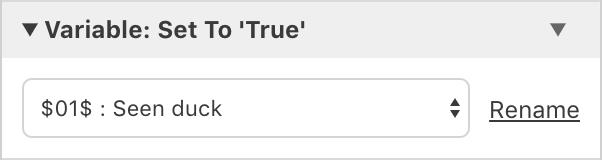
Variable: Set To ‘True’
Set the value of the specified variable to true.
-
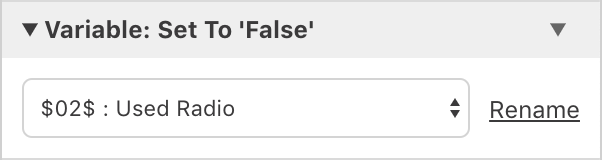
Variable: Set To ‘False’
Set the value of the specified variable to false.
-
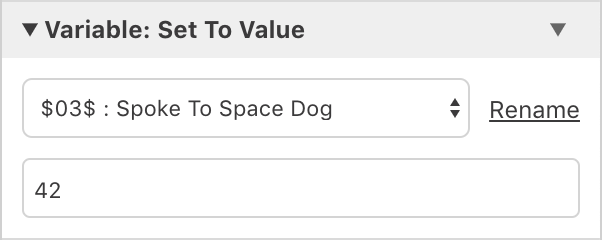
Variable: Set To Value
Set the specified variable to a defined value.
-
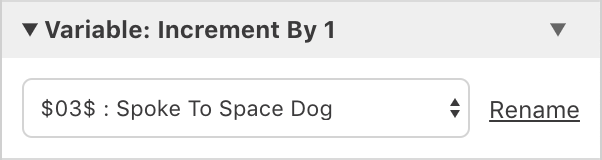
Variable: Increment By 1
Increase the value of the specified value by one, up to a maximum of 255. If the value was previously false it will now be 1 (and also true), if it was previously true it will now be 2.
-
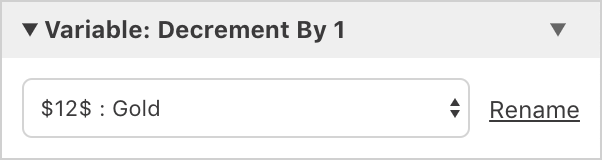
Variable: Decrement By 1
Decrease the value of the specified value by one, down to a minimum of 0. If the value was previously true it will now be 0 (and also false).
-
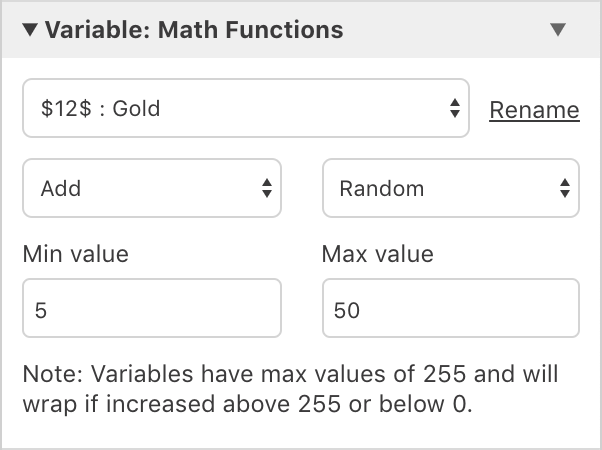
Variable: Math Functions
Allows you to perform various maths functions on a variable to add/subtract/multiply/divide/modulus a value/variable/random number.
Note: Variables have max values of 255 and will wrap if increased above 255 or below 0.
-
Variable: Set Flags
Set the value of a variable by enabling individual bits of the 8-bit number. Allows 8 true/false values to be stored within a single variable. Setting the flags will replace the previous value of the variable.

-
Variable: Add Flags
Set selected flags to true on a variable. All unselected flags will keep their previous value.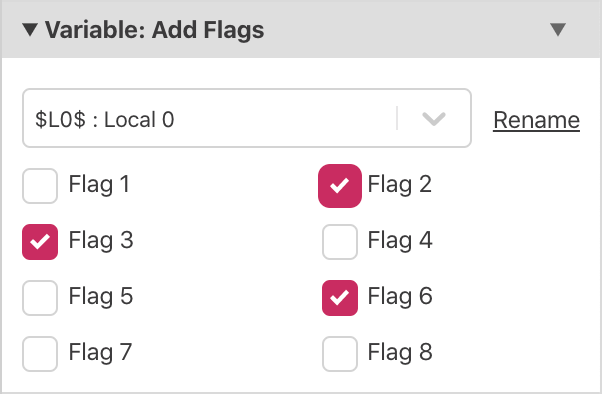
-
Variable: Clear Flags
Set selected flags to false on a variable. All unselected flags will keep their previous value.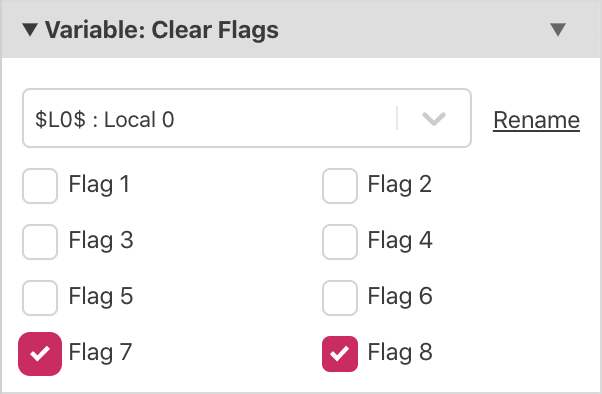
-
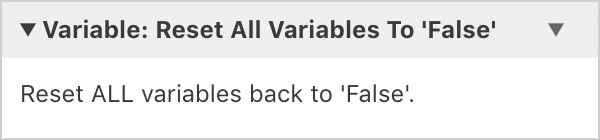
Variable: Reset All Variables To ‘False’
Reset all variables used by your project back to false.
Control Flow Events
-
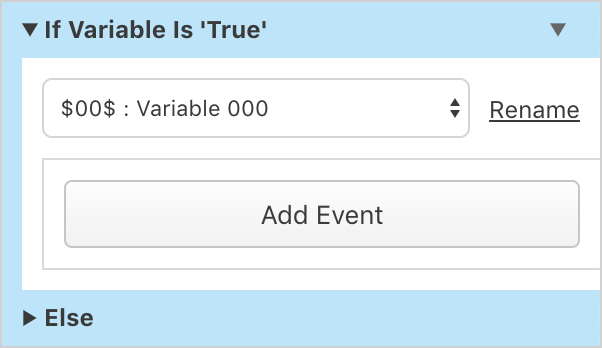
If Variable Is ‘True’
Conditionally execute part of the script if the specified variable is set to true.
-
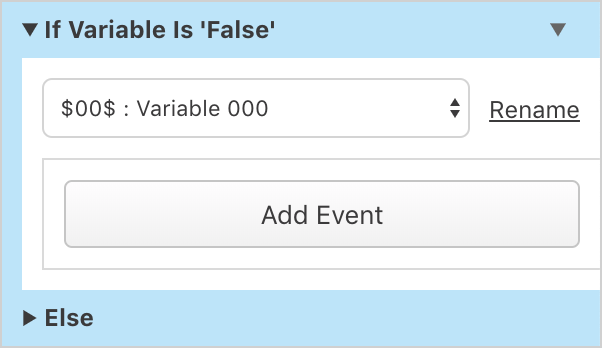
If Variable Is ‘False’
Conditionally execute part of the script if the specified variable is false.
-
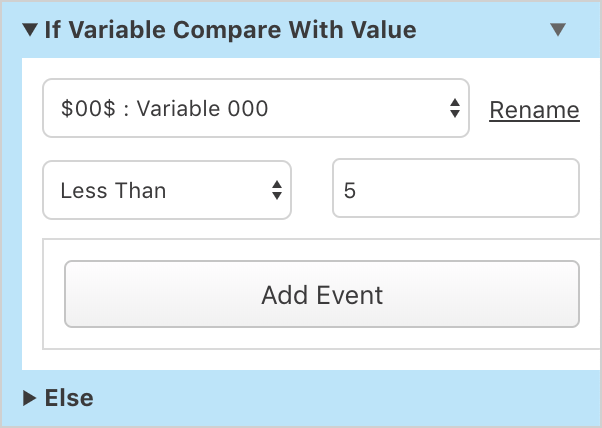
If Variable Compare With Value
Conditionally execute part of the script if the specified variable matches a rule, such as “Equal To”, “Greater Than” or “Less Than” against a value.
-
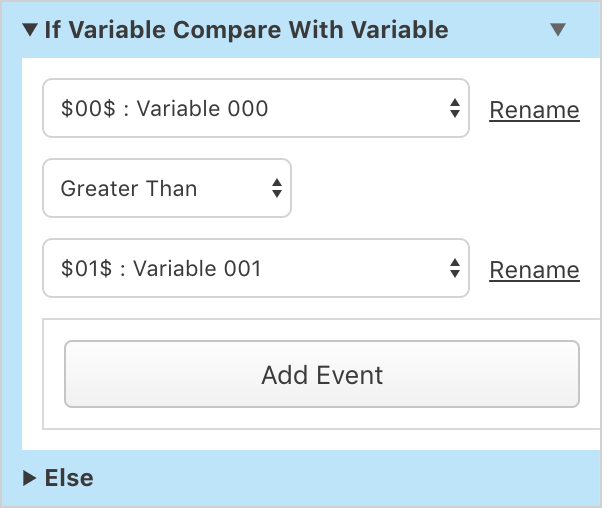
If Variable Compare With Variable
Conditionally execute part of the script if the specified variable matches a rule, such as “Equal To”, “Greater Than” or “Less Than” against a second variable.
-
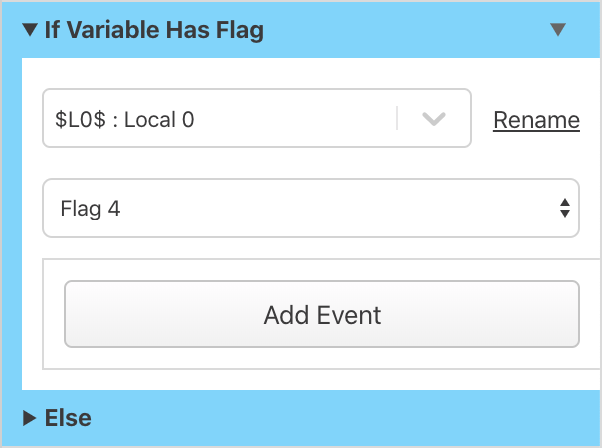
If Variable Has Flag
Conditionally execute part of the script if the specified variable has the chosen flag set as true.
-
If Joypad Input Pressed
Conditionally execute part of the script if the specified joypad input is currently pressed. Will not wait for user input so use directly after a Joypad Input: Pause Script Until Pressed event if waiting is required. Event will only execute once, if you wish to run a script every time a button is pressed use Joypad Input: Attach Script To Button instead.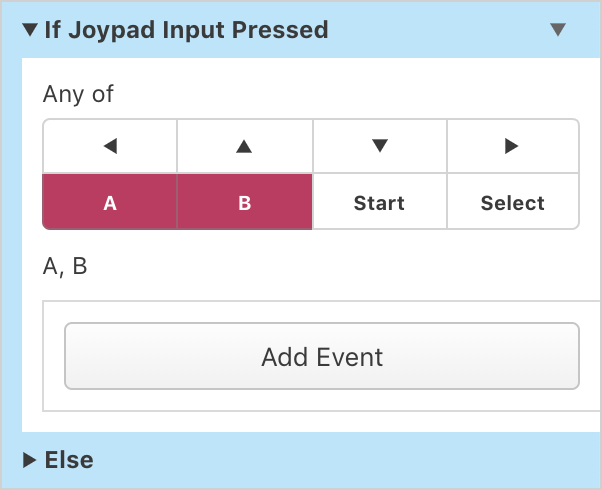
-
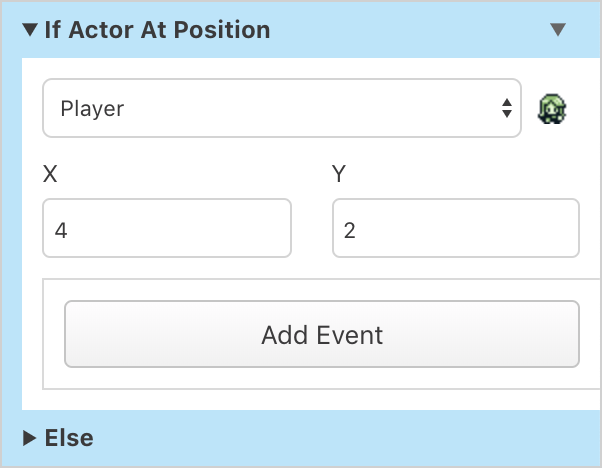
If Actor At Position
Conditionally execute part of the script if the specified actor is at a certain position in the scene.
-
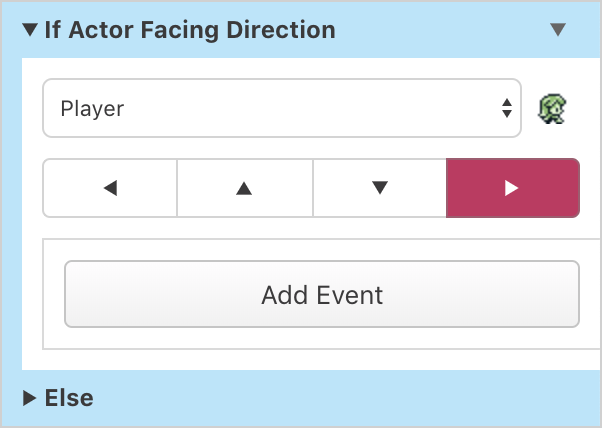
If Actor Facing Direction
Conditionally execute part of the script if the specified actor is facing a certain direction.
-
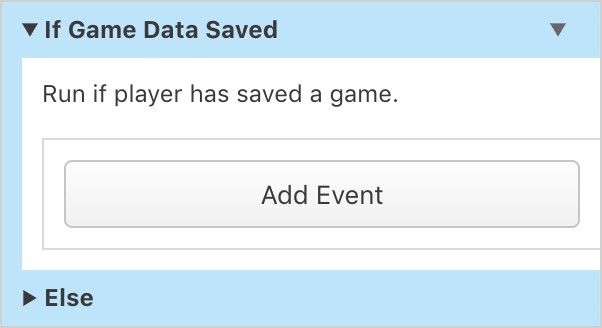
If Game Data Saved
Conditionally execute part of the script if there is a saved game available.
-
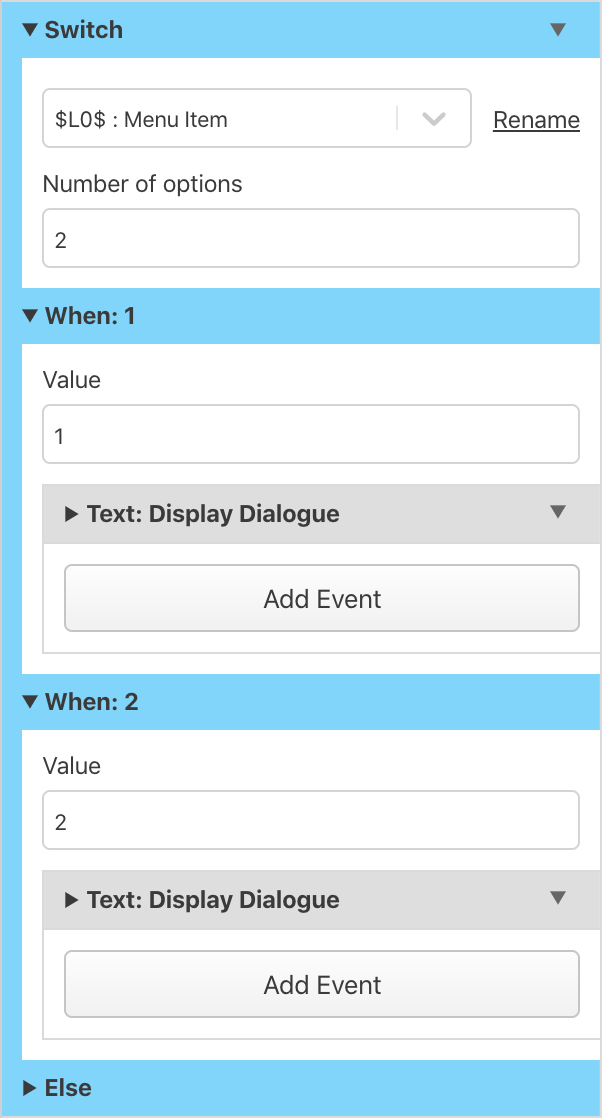
Switch
Conditionally execute from multiple options depending on the value of the specified variable. First choose how many options you want to compare the variable against, then set the values to compare and what scripts to execute when the value is matched.
-
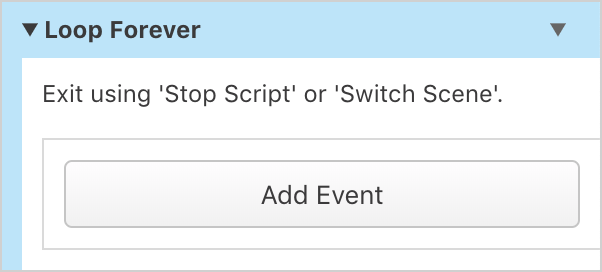
Loop Forever
Execute part of the script in a loop forever. Remember to break out of the loop otherwise the player will become stuck at this point. You can use a Stop Script or Change Scene event to stop the loop.
-
Label: Define / Label: Goto
Define markers in your script using Label: Define giving the label a name and jump to markers using Label: Goto.
Note: The name must be identical for the define/goto event pair to work. Use with care!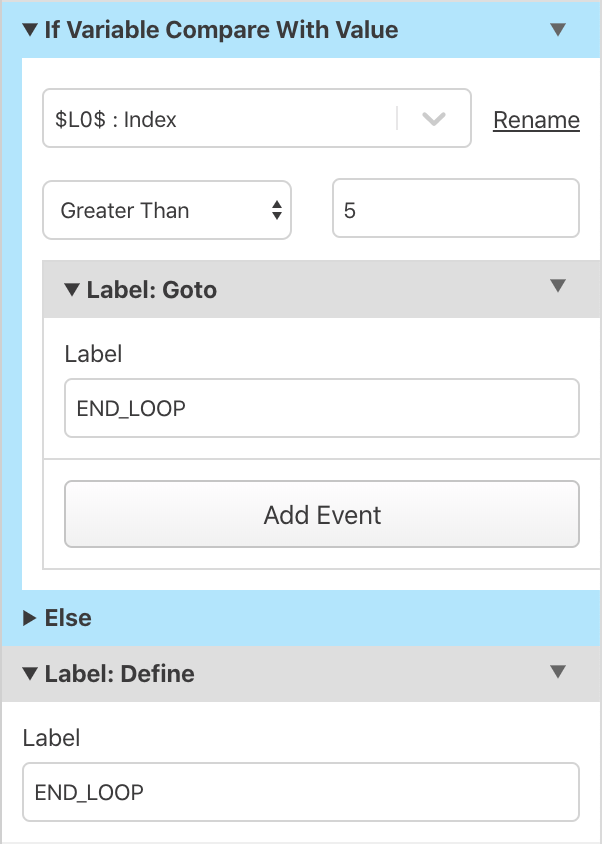
-
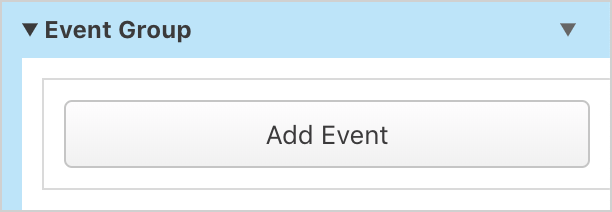
Event Group
Provides no in game functionality but allows you to group a sequence of events together and give them a label (using the Rename Event option on the event menu) and collapse the events into a single block.
-
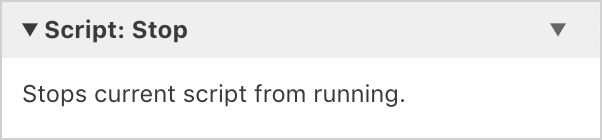
Script: Stop
Stops the current script from running.
-
Disable Else
If you don't require an Else branch in any of your control flow events you can now disable it by selecting Disable Else from the event dropdown menu. The same menu can be used to restore an Else branch if needed at a later time.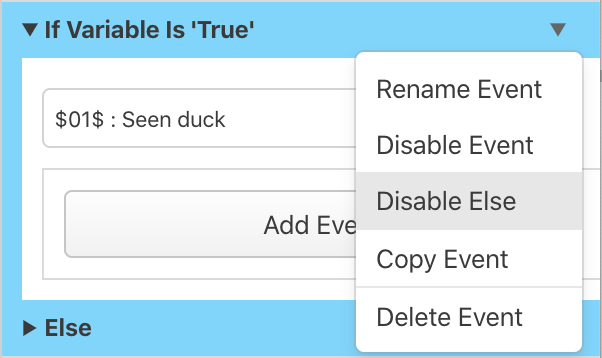
Camera Events
-
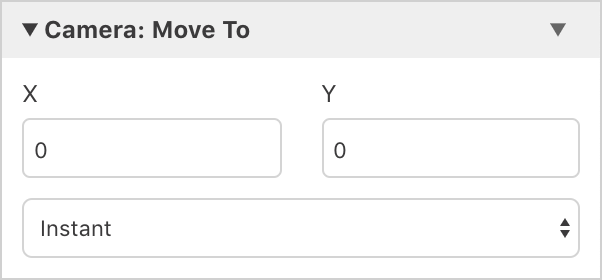
Camera: Move To
Move the camera to a specifed position in the scene.
-
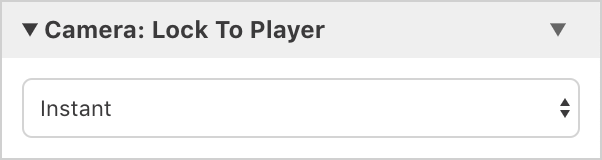
Camera: Lock To Player
Move the camera back to focusing on the player, locking into position when the player moves.
-
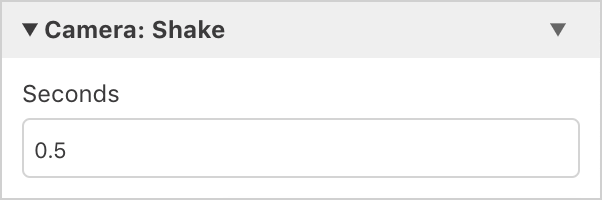
Camera: Shake
Shake camera effect for up to 10 seconds.
Screen Events
-
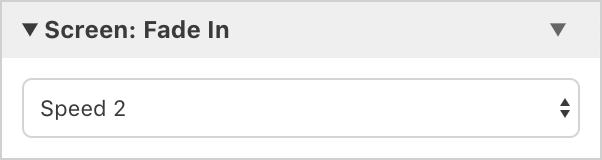
Screen: Fade In
Fade the scene to a white screen.
-
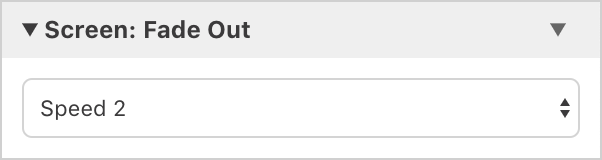
Screen: Fade Out
Fade the scene in from a white screen.
Actor Events
-
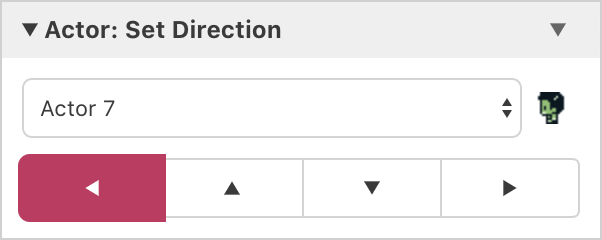
Actor: Set Direction
Set the facing direction of the specified actor.
-
Actor: Set Direction Using Variable
Set the facing direction of the specified actor from the value of a variable.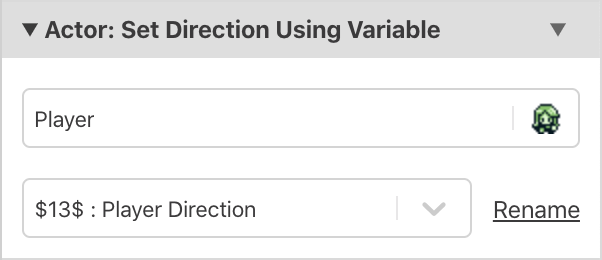
Direction Value Down 1 Right 2 Up 3 Left 4 -
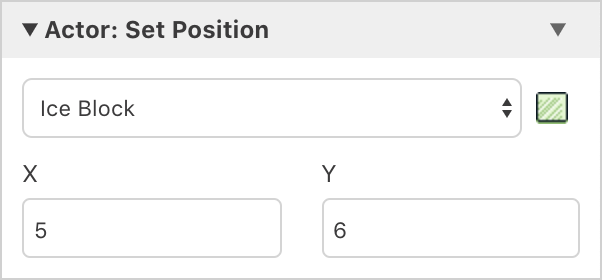
Actor: Set Position
Set the position in the scene of the specified actor.
-
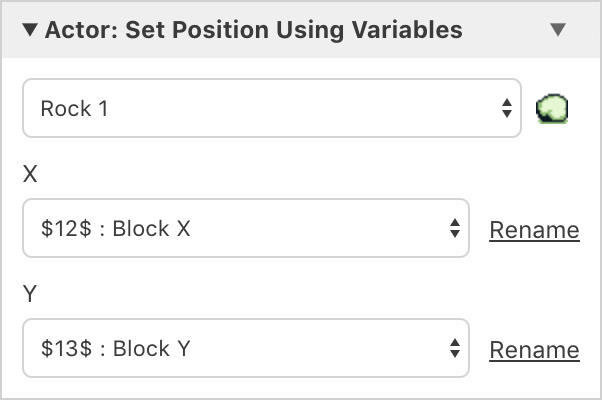
Actor: Set Position Using Variables
Set the position in the scene of the specified actor from the values of two variables.
-
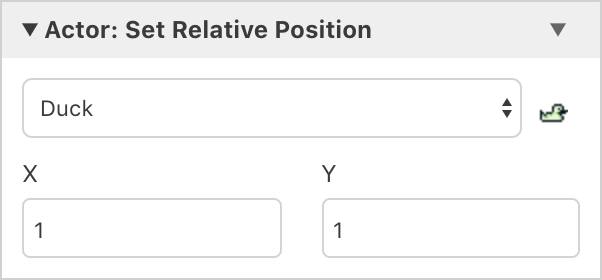
Actor: Set Relative Position
Set the position in the scene of the specified actor relative to their current position.
-
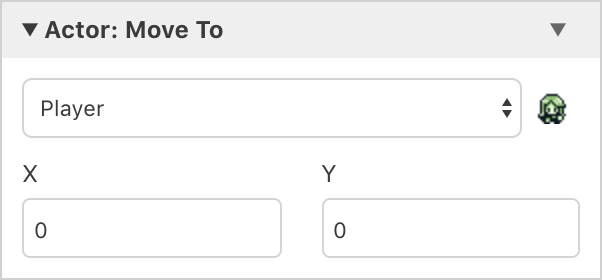
Actor: Move To
Make the actor walk to a specified position in the scene. Actor will ignore all collisions along path so combine multiple of these events if you need to specify an exact path avoiding obstacles in the scene.
-
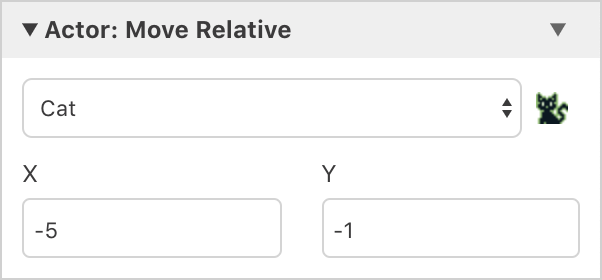
Actor: Move Relative
Make the actor walk to a position relative to their current position.
-
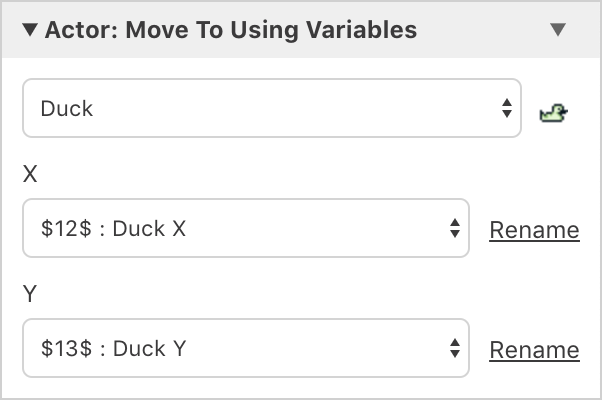
Actor: Move To Using Variables
Make the actor walk to a position from the values of two variables.
-
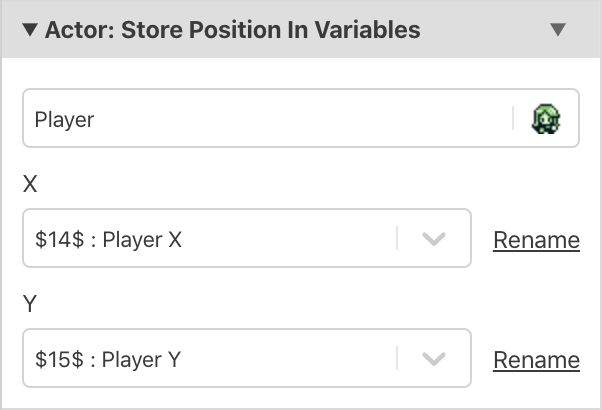
Actor: Store Position In Variables
Store the current position of an actor into two variables.
-
Actor: Store Direction In Variable
Store the current direction of an actor into a variable.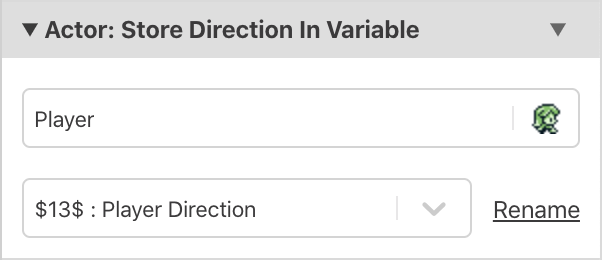
Direction Value Down 1 Right 2 Up 3 Left 4 -
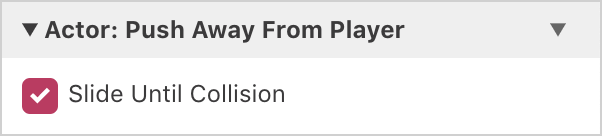
Actor: Push Away From Player
Push an actor in the direction the player is currently facing. By default pushes by one tile, but can optionally slide until a collision occurs.
-
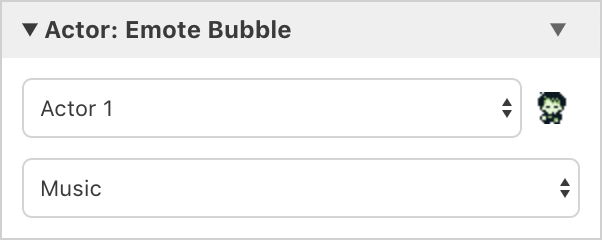
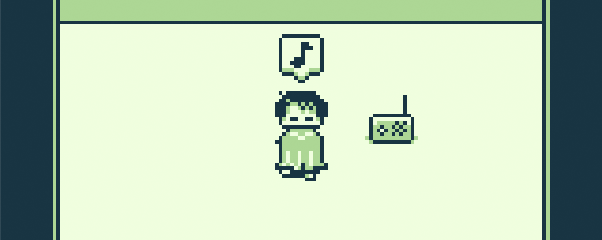
Actor: Emote Bubble
Display an emote bubble above the specified actor from one of Shock, Question, Love, Pause, Anger, Sweat, Music and Sleep. You can change the graphics used for these bubbles by editing the UI Elements of your game.
-
Actor: Set Animation Frame
Set the current animation frame of the specified actor.

-
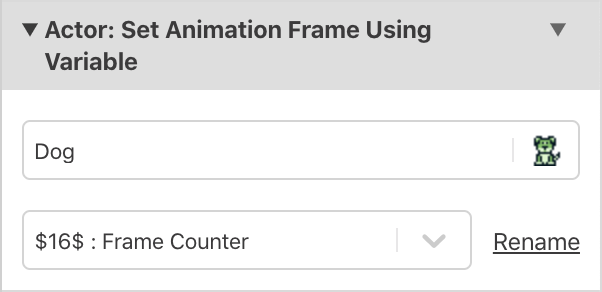
Actor: Set Animation Frame Using Variable
Set the current animation frame of the specified actor to the value of a variable.
-
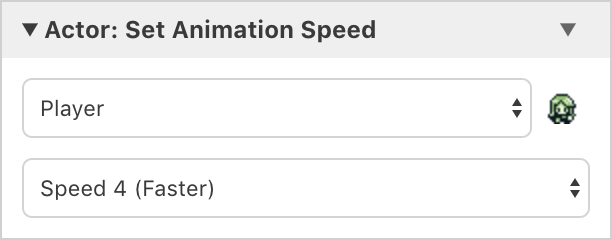
Actor: Set Animation Speed
Set the animation speed of the specified actor.
-
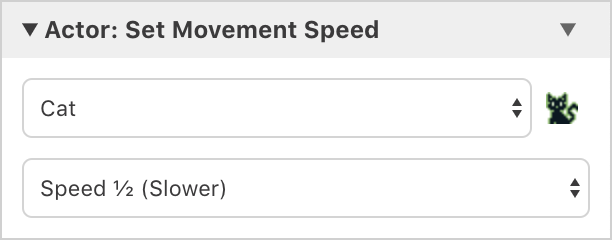
Actor: Set Movement Speed
Set the movement speed of the specified actor.
-
Actor: Set Player Sprite Sheet
Change the player sprite sheet from the default defined in the Project Editor. Changes to the player sprite sheet will persist between scene transitions so make sure to change it back if the change was supposed to be temporary.

-
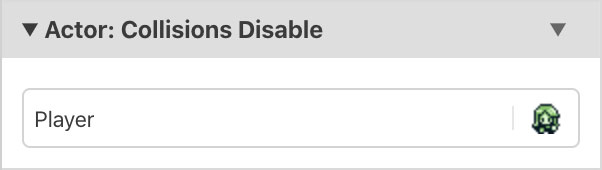
Actor: Collisions Disable
Prevent collisions from affecting the selected actor. If a scene actor is selected then the player will be able to walk through them, if the player is selected then you will be able to walk through all actors and collisions in the scene.
Note: While collisions are disabled it is still posible to interact with the actor.
-
Actor: Collisions Enable
Reenable collisions on the selected actor.

-
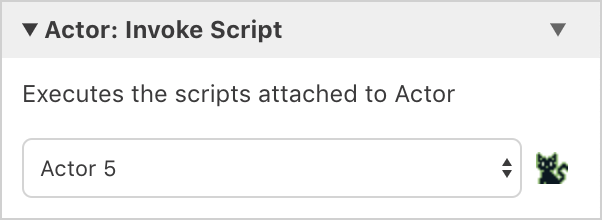
Actor: Invoke Script
Call the script on another actor in the scene as if the player had interacted with that actor.
-
Actor: Hide
Hide an actor so it is no longer visible. Hidden actors will no longer cause collisions and will not be able to be interacted with. You can hide the player on a Scene Start Script to make menu and title screens.

-
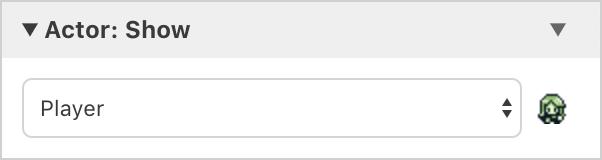
Actor: Show
Unhide a previously hidden actor.
Sprite Events
-
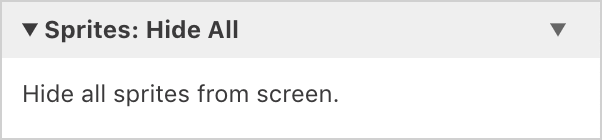
Sprites: Hide All
Hide all sprites in scene. Can be useful to create cutscenes where the player should not be visible by adding to a scene's starting script.
-
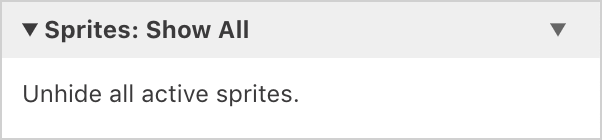
Sprites: Show All
Show all sprites that were previously hidden.
Overlay Events
-
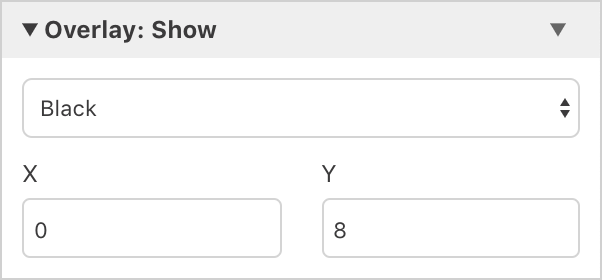
Overlay: Show
Show either a black or white window over the top of the current game screen. Can be used to obscure and then reveal parts of the scene background for example on the sample project logo screen.
-
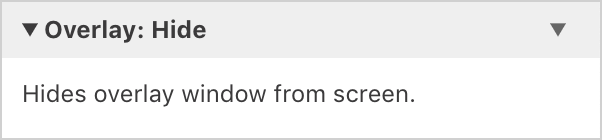
Overlay: Hide
Hides the screen overlay.
-
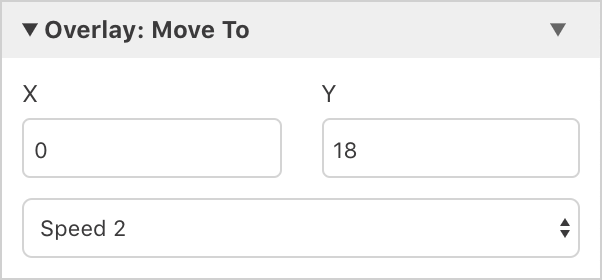
Overlay: Move To
Moves the overlay to a new position on the screen.
Input Events
-
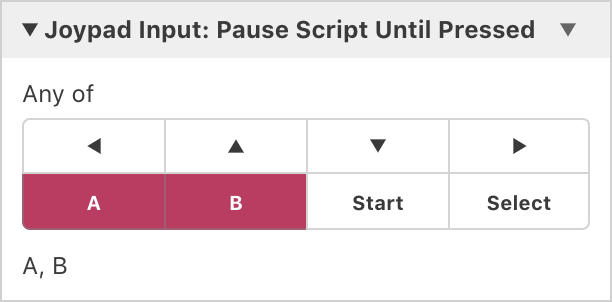
Joypad Input: Pause Script Until Pressed
Pauses the script until one of the specified joypad inputs are pressed.
-
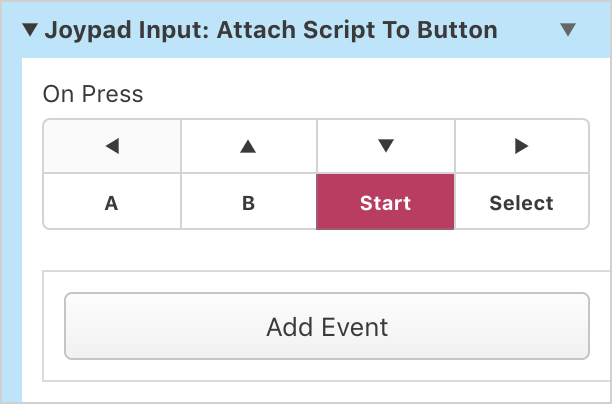
Joypad Input: Attach Script To Button
Execute the specified script any time a joypad input button is pressed. If you attach scripts to a direction button or the A button the scripts will override the default game actions.
-
Joypad Input: Remove Attached Script
Remove an attached script from a joypad input button restoring the default functionality of the button.
Music Events
-
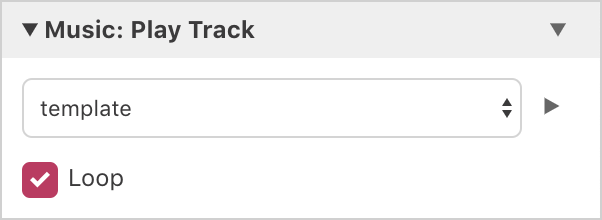
Music: Play Track
Plays a music .mod file, optionally looping the file when finished. If you play a new song while another song is playing, the old song will stop automatically.
-
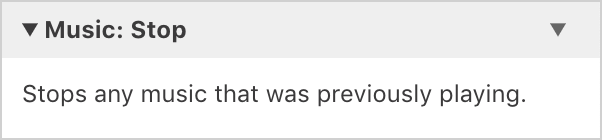
Music: Stop
Stops any currently playing music. Put this before a Music: Play Track event to restart the same song from the beginning.
Sound Events
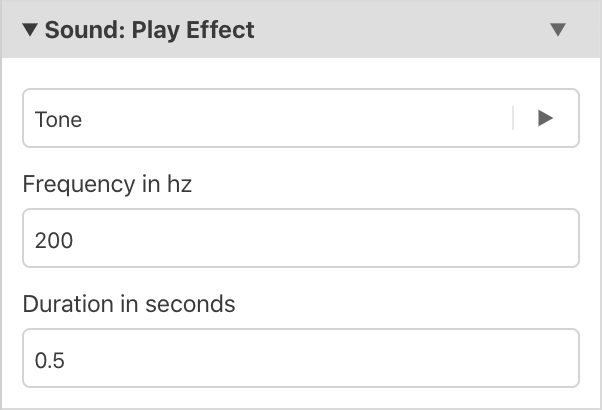
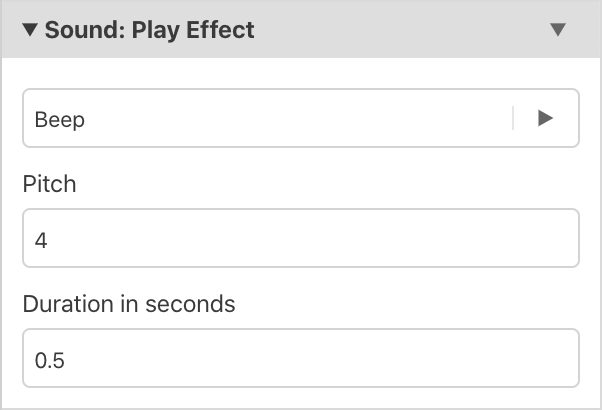
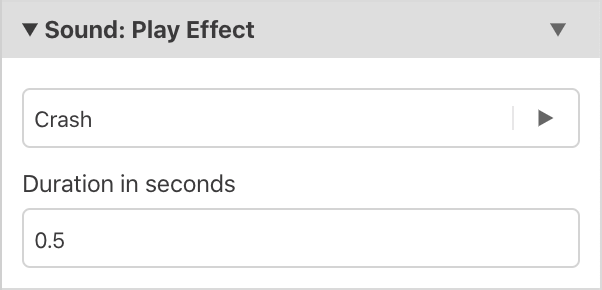
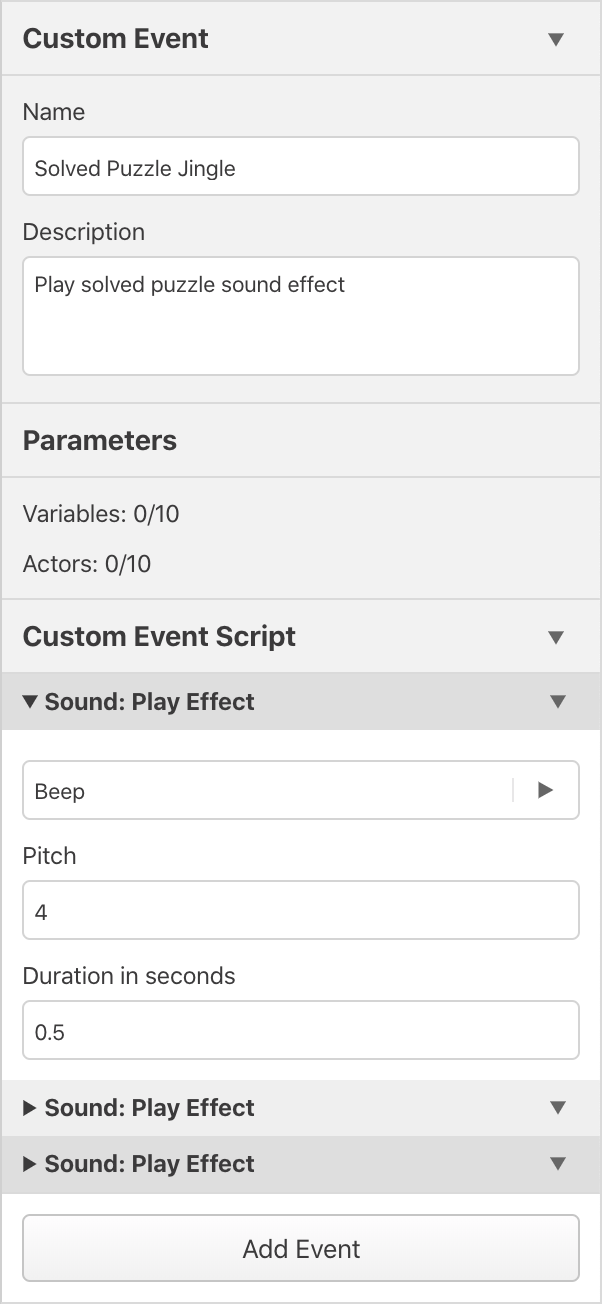
- Sound: Play Effect
Play a sound effect, choose from playing a beep with a given pitch, a tone with a given frequency or cymbal crash. Using Custom Events you can combine multiple effects into a single reusable event to make jingles.
Timing Events
-
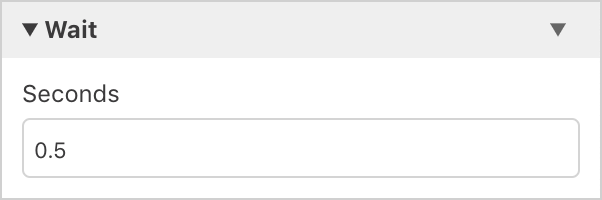
Wait
Pause script for up to 10 seconds.
-
Timer: Set Timer Script
Execute the specified script repeatedly after a time interval. The script will keep running in the background until a Disable Timer Script event is called or the scene is changed using a Change Scene event.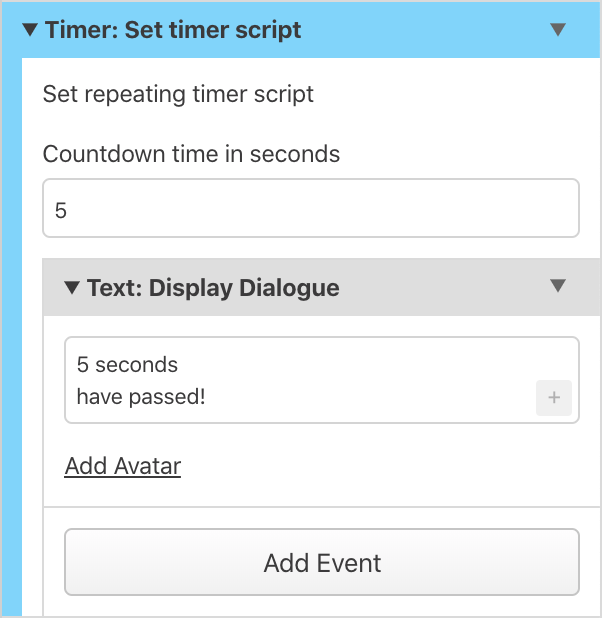
-
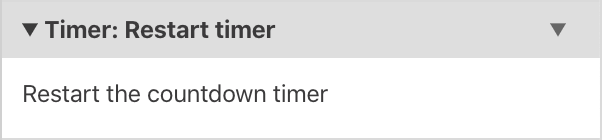
Timer: Restart Timer
Reset the countdown timer back to zero. The script will call again after the time specified originally.
-
Timer: Disable Timer Script
Remove the timer script so it will no longer be called.
Game Data Events
-
Game Data: Save
Save the current game data.
-
Game Data: Load
Load the previously saved game data.
-
Game Data: Clear
Remove any previously saved game data.
Miscellaneous Events
- Comment
Allows you to leave notes within your scripts. Provides no functionality in-game. The text you type automatically gets set in the event title, so you can collapse the comment and still read its content.
You can also use the event dropdown menu to disable and reenable any event.
Disabled events will be skipped when run in game.

Custom Events
New in 1.2.0
Custom Events allow you to create reusable procedures in your game that can be used across any of your scripts.
Clicking in the background between scenes switches the sidebar back to the Project Editor which will list any Custom Events in your project along with a button to Create Custom Event.
Once you've given your Custom Event a name you can start building a script in the same way you would for Actors, Triggers and Scenes.
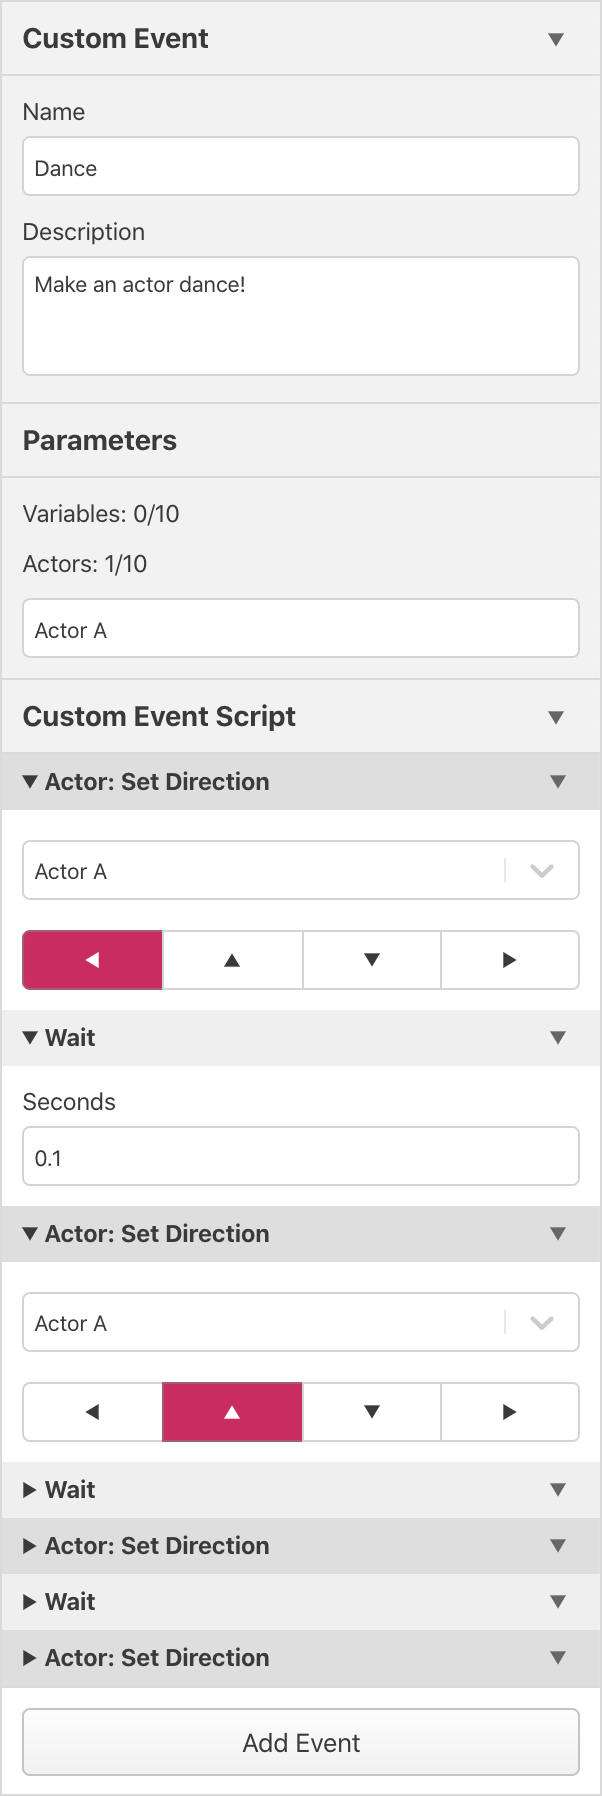
Parameters
Whenever you add an event that reads a Variable it will get added to the list of input parameters for the Custom Event, where you are able to give that input a memorable name. Events that affect Actors will, by default, apply to the player but if you use the actor selector you will be able to set the event to read the Actor value from an input parameter also.
For example the following custom event makes Actor A rotate in a circle.
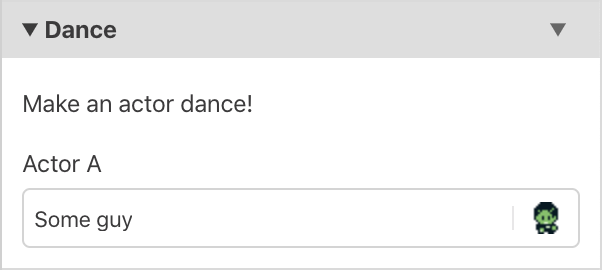
This custom event can then be used within Actor, Trigger and Scene scripts where it will appear as follows.
If you ever want to edit the Custom Event you can return to it using the list on the Project Editor or by selecting Edit Custom Event from the event dropdown menu.

Assets
When your project was created an assets folder was also made within the project containing a number of subfolders for each asset type in your game.
GBStudio doesn't currently contain any ability to edit the graphics or music in your game directly, you instead can use your favourite existing applications and save files into these folders where they will instantly appear ready to use in your project. If you edit a sprite or background PNG file and save using an external image editor the change will be seen in your Project Window as soon as you switch back it.
While you can create graphics in any application that can output PNG files it is recommended to use Aseprite or Photoshop to create your sprites and UI elements then to use Tiled Map Editor to create your backgrounds. Each image asset type has a different set of requirements detailed over the new few sections of this documentation.
For music you must create new tracks as MOD files with only four channels. You can create these files with OpenMPT or MilkyTracker.
Community Assets
If you're looking for a collection of free assets, ready to be used in GB Studio there is a community run repository on Github available at GB Studio Community Assets.
Sprites
Sprites are the graphics used by playable or interactive characters in your scenes. Add sprites to your game by including PNG files in your project's assets/sprites folder.
Requirements
Sprite PNGs must only contain the following four colors:
The color #65ff00 is used to represent a transparent background in game and will be invisible in-game and in the World Editor.
Colors that are not one of the above hex codes will be matched to the nearest color. Unlike backgrounds, the color #306850 can not be used in sprites.
A sprite consists of one or more 16px x 16px frames laid out horizontally in file. A sprite with a single frame will be 16px x 16px while a sprite with three frames will be 48px x 16px.
Static sprites
For sprites that only need a single frame (e.g. static items such as signposts) create your PNG as a 16px x 16px image containing just the one frame required.

Animated sprites
If you want to have sprites that play short animations you can make a PNG with between 2 frames at 32px x 16px and 25 frames at 400px x 16px. Using these sprites on an actor will enable you to select which frame you want to display by default and will allow an animation to be played at a specified speed.

Actor
To make sprites that can face in four directions turning towards the player, create a 48px x 16px PNG containing the three frames forward facing, upwards facing and right facing. The left facing sprite is automatically generated by flipping the right facing sprite horizontally so does not need to be created.

Animated Actor
To make sprites that have animated movement, or that can be used as a player character, create a 96px x 16px PNG containing six frames, two forward facing, two upwards facing and two right facing animation frames.
As there are limits to how many sprites frames can be loaded into a single scene don't use animated sprites unless you know your NPCs will need animated movement.

Backgrounds
Each of your scenes requires a background image that defines how that scene should look. You can add backgrounds to your game by including PNG files in your project's assets/backgrounds folder.
Color Requirements
Background PNGs must only contain the following four colors:
Colors that are not one of the above hex codes will be matched to the nearest color. Unlike sprites, the color #65ff00 can not be used in backgrounds.
Size Requirements
- Backgrounds are divided into
8pxx8pxtilesets so the total image size must be a multiple of8pxin both width and height. - A background has a minimum size of
160pxx144px(the GB screen size) - Both the width and height of a background must be less than or equal to
2040px. - The width of the image multiplied by the height must be less than or equal to
1,048,320. For example an image with the width2016pxwill have a max height of520px(because2016 * 520 = 1048320)
Tile Requirements
An image can contain no more than 192 unique 8px x 8px tiles at once due to memory limits. This means that even using the smallest background size possible you must repeat about half of your tiles. Where possible repeat tiles between images as they will be grouped together saving on total game size. It is recommended to use a tile map editor such as Tiled to ensure your backgrounds conform to the pixel grid.
UI Elements
Your project contains a number of files in assets/ui with fixed file names that define parts of your game's user interface. Editing these files allows you to change the default font, set the window frame and modify the selection cursor.
If you remove any of the files in the ui folder they will be replaced with the default assets the next time you build your game allowing you to revert any unwanted changes.
ascii.png
Edit this file to change the game's font when talking to actors in your game.
frame.png
The game engine uses 9-slice scaling of this image to create the frame around text boxes. Editing this image will allow you to change the frame design or set it to a solid color.

cursor.png
This image is used as a selection cursor when showing multiple choice options in your game.

emotes.png
This image used to define the look of the emote bubbles that can be shown above actors using scripting. Each bubble is 16px x 16px in size and the each bubble represents Shock, Question, Love, Pause, Anger, Sweat, Music and Sleep in that order left to right.

Requirements
With the exception of emotes.png which follows the standard sprite requirements, UI PNGs must only contain the following four colors:
Music
Music can be played in your game using the Music: Play event in your Actor, Trigger, or Scene scripts.
Requirements
Add music to your game by including .mod files in your project's assets/music folder. GB Studio uses GBT Player which is a driver that takes .mod files and converts them to instructions for the Gameboy. GBT Player interprets .mod files differently than the Amiga computers that the .mod format was originally designed for, so every .mod file that GBT Player reads should be composed/arranged to be used with GBT Player.
As an alternative to composing, there is a way to import .midi files to OpenMPT for playback in GBT Player. More information can be found under Frequently Asked Questions. You can also browse the GB Studio Community Assets to find free, GBT-compatible music under the MIT licence.
To compose GBT-compatible .mod files, you can use software such as OpenMPT (for Windows or Linux using Wine), MilkyTracker (for Windows, Mac and Linux), ProTracker, and BassoonTracker (browser-based) to name a few. Any software that loads and exports .mod files can write files that are compatible with GBT Player.
Resources
It is recomended you read through your tracker's documentation to learn about your tracker:
Lastly, the GB Studio Discord also has a dedicated #music-help channel and a #tutorials channel in case you get stuck.
Getting Started
- Create a blank GB Studio project, find the file
assets/music/template.modand open it with your tracker of choice.- You must edit this file to get an accurate representation of the instruments you can use.
- MilkyTracker users should save this file as an
.XMfile. Saving a .mod file in MilkyTracker will corrupt it. Export your song as a .mod file every time you want to test your song in-game.
- Use the instrument list shown later in this document to pick the sounds you want. Changing the samples in your tracker will not affect how they sound in-game.
When done, add your .mod files to the assets/music folder of your project. Test your song in-game often to keep track of any audible in-game differences.
Here is a quick rundown of how a tracker works:
C-5 01 v64 ...
--- -- --- ---
 |   |  |   |
 |   |  |   +-- Effect column (Volume changes, arpeggios, panning, etc.)
 |   |  +------ Volume value, this is irrelevant in .MOD. (Most examples here omit this
 |   |          and instead display three dots in its place)
 |   +--------- Instrument
 +------------- Note and octave (A C note in the 5th octave. The dash can be a #, which signifies a sharp note e.g. C#, D#)
This is what comprises of a channel's row. Rows can be empty, or can only be partially filled (with just an effect, for example). There's 4 of those columns in total.
Any part in this documentation where you see data that starts with ModPlug Tracker MOD, you can copy that entire block into OpenMPT as-is. Any data copied from OpenMPT looks like that when you paste it into any text application.
GBT Player's Channel Limitations
.MOD files need to use 4 channels. Loading a copy of template.mod before composing will ensure this is set-up correctly.
| Channel # | Sound type | Note Range1 | Instruments | Effects |
|---|---|---|---|---|
| Channel 1 & 2 | Pulse | C3 to B8 | 1-4 | 0, C, E8, EC, B, D, F |
| Channel 3 | Waveform | C3 to B8 | 8-15 | 0, C, E8, EC 2 |
| Channel 4 | Noise | Only C5 | 16-31 | C, E8, EC, B, D, F |
1 This range is for One-Indexed Trackers (C1 is the lowest-possible note). This is comparable to OpenMPT in default settings. Trackers that are Zero-Indexed by default (C0 is the lowest-possible note) should interpret these Note Ranges a full octave down. This is comparable to MilkyTracker in default settings.
Using default settings on OpenMPT and MilkyTracker, C3 to B8 in OpenMPT sounds the same as C2 to B7 in MilkyTracker.
2 Effects B, D, and F can be also used on Channel 3 if the same row isn't being used to set a note/instrument.
Volume Limitations
Currently, volume can only be adjusted by using the Cxx effect for each channel.
The Gameboy has 16 unique volume settings for Channels 1, 2 and 4. GBT Player will floor (round-down) the values in a Cxx volume effect to multiples of 4.
Unique Volume Settings for Channels 1, 2 and 4:
00, 04, 08, 0C, 10, 14, 18, 1C, 20, 24, 28, 2C, 30, 34, 38, 3C
Any number that's not a multiple of 4 will be rounded-down to one of the above numbers.
Example: Entering C01, C02 and C03 will sound the same as entering C00.
Example: Entering C40 will sound the same as entering C3C.
Channel 3 is the exception to this with only 4 unique volume settings.
Unique Volume Settings for Channel 3:
00, 10, 20, 40
GBT Player will round Cxx effects on Channel 3 to the nearest number listed above.
Example: Entering C30 will round the volume up to C40.
Volume Persistence
In most trackers, if a note is played without a volume command, the note's volume is reset to the maximum. When a .mod file is converted by GBT Player, notes without a volume effect will play at the same volume as the previous Cxx effect that the channel read. For example, take this scenario:
ModPlug Tracker MOD
|C-502...C40|
|...........|
|...........|
|...........|
|........C..|
|...........|
|E-502......|
In the tracker, the E-5 note will resume at full volume after the C00 effect.
In-game, you will not hear the E-5 note. This is because the C00 persists until another Cxx effect is set. To make the tracker playback sound identical to the in-game playback, the following must be done:
ModPlug Tracker MOD
|C-502...C40|
|...........|
|...........|
|...........|
|........C..|
|...........|
|E-502...C40|
Additionally, Channel 3 requires that the instrument and note is set during a volume change for the volume change to have any effect. (Except for C00.) For example:
ModPlug Tracker MOD
|C-511...C40|
|...........|
|...........|
|...........|
|........C20|
|...........|
|G-511...C40|
You will not hear any volume change from the C20 in-game. Add a note and instrument on C20 to register the volume change.
ModPlug Tracker MOD
|C-511...C40|
|...........|
|...........|
|...........|
|C-511...C20|
|...........|
|G-511...C40|
Instruments
All numbers listed here are in base-10 unless otherwise noted.
The pulse channels 1 and 2 have four instrument options:
- 25% pulse
- 50% pulse (square wave)
- 75% pulse (inverted 25% pulse)
- 12.5% pulse
Instruments 5 through 7 are intentionally left blank.
Channel 3, the wave channel, has 8 instrument options:
- Buzzy (Source code calls this “random :P”)
- Ringy (useful for SFX)
- (A) Sync Saw
- (B) Ring Saw
- (C) Octave Pulse + Triangle
- (D) Sawtooth
- (E) Square
- (F) Sine
As of GB Studio 1.2.1, GBT Player uses 16 instruments to access pre-determined noise settings - instruments 16 to 32.
Instruments 16 to 23 use Periodic (looped) Noise at various pitches, while instruments 24 to 32 use Pseudorandom noise at various pitches.
The nicknames and descriptions next to these instruments are not official for GBT Player, they are intended to help identify these noise presets at a glance.
Periodic Noise:
- (10hx) “stutter” - A square plus a pulse at random pulse widths
- (11hx) “rumble” - The same waveform but faster
- (12hx) “engine” - The same waveform but even faster
- (13hx) “low tone” - Sounds like D5
- (14hx) “undertone” - Sounds like E5 + 50cents
- (15hx) “middletone” - Sounds like B5 + 50cents
- (16hx) “overtone” - Sounds like D6 + 50cents
- (17hx) “high tone” - Sounds like D7
Pseudorandom Noise:
- (18hx) “earthquake” - A square with a thin pulse at random pulse widths
- (19hx) “spaceship” - The same as 24 but faster
- (1Ahx) “ocean” - etc.
- (1Bhx) “scratch” - etc.
- (1Chx) “glitch” - A fairly clean white-noise sample, unrelated to other instruments
- (1Dhx) “volcano” - A pulse with rapidly changing pulse width
- (1Ehx) “scream” - The same as 29 but faster
- (1Fhx) “static” - etc.
As of GB Studio 1.2.1 there are no GBT Player-readable instruments beyond 31. (1Fhx)
Effects
There are two types of effects: Note-effects and Command-effects.
The only restrictions on effects is the Command-effects with Channel 3. It can use them when it's not trying to play a note/set the instrument on the same row.
Note-effects (uses bit 3) - All channels can use these effects freely
| Effect | Name | Notes on effect usage |
|---|---|---|
| 0xy | Arpeggio | Rapidly cycles between 3 notes. x and y both represent the # of semitones above the note the arpeggio effect is attached to. |
| Cxx | Volume | Sets the volume to xx. See Volume Limitations for more info. |
| E8x | Pan | Sets the panning to x. 0-3 = Left, 4-B = Centre, C-F = Right. |
| ECx | Note cut | Cuts the note after x frames. Must be below the Fxx speed for the cut to be heard. EC0 will reset the duty cycle instead of cutting the note. |
Command-effects (uses bit 4) - Channel 3 can use these effects if it's not trying to play a note/instrument on the same row.
| Effect | Name | Notes on effect usage |
|---|---|---|
| Bxx | Jump | Jump to a specific position in the song, xx. |
| Dxx | Pattern break | Jumps to the next pattern early, where xx is the row it should jump to in the next pattern. Using this on the last pattern will break the song by reading garbage data beyond the song. |
| Fxx | Set speed | Sets the song speed to xx. Valid values are 01 to 1F. The value represents how many frames should the song wait before moving on to another row. Setting BPM speed has no effect upon conversion. |
For Channel 3 only, the instrument data is too large to allow the 4th bit of a Command effect to occur while it's trying to play a note/set the instrument. Command-effects will ignore new notes on Channel 3 to compensate.
Speed Table
| Fxx Value (in tracker) | BPM (in tracker) | BPM (in game) |
|---|---|---|
| F011 | 750 BPM | 900 BPM |
| F021 | 375 BPM | 450 BPM |
| F031 | 250 BPM | 300 BPM |
| F041 | 187.5 BPM | 225 BPM |
| F05 | 150 BPM | 150 BPM |
| F06 | 125 BPM | 128.57 BPM |
| F07 | 107.14 BPM | 112.50 BPM |
| F08 | 93.75 BPM | 100 BPM |
| F09 | 83.33 BPM | 90 BPM |
| F0A | 75 BPM | 81.82 BPM |
This is not a full table, it's just the top few speeds. It's here to highlight some of the speed discrepancies, albeit small to not be very noticeable, with the exception of the values marked with 1.
You might notice that the value of the F effect, when converted to decimal, is just the speed divisor. For instance, F03 divides the BPM by 3 (750 / 3 = 250, or 900 / 3 = 300).
Because of how GB Studio is set up, a 60hz F05 effect, which would result in 180 BPM in-game, is impossible here.
While not in GB Studio, GBT has a flag called -speed that will handle BPM differently, which would require F96 effects for every speed, as it won't handle any internal conversions to get the speed closer. This is the reason why F01 to F04 require F96 in both modes, there's no equivalent for it in tracker speed.
1. Values marked with 1 require an additional F96 effect for the song to sound closer in speed when converted, or setting the song BPM to 150. This F96 effect can be removed once you're done with your song, there won't be any difference as GBT ignores this – It's only here to set the BPM to something closer to the in-game version.
Tricks and Tips
1. High Speed
By using F01 to F04, you can achieve much higher granularity when it comes to changing volumes and creating sounds of sorts. This means that with a high enough speed, you can create more varied bodies for sounds, with sort-of envelopes, or elaborate effects (like 1 channel echos, which I'll cover here in a moment).
This trick means you're going from drums that sound flimsy and primitive to something more impressive.
Here's an example of a Snare Drum, at speed F02, that might sound good for you.
ModPlug Tracker MOD
|C-526...C40
|C-527...C28
|........C20
|........C18
|........C10
|........C08
|........C04
|........C..
(this is on the noise channel)
If this is longer than what you need, simply crop it starting from the bottom.
You can also use this for tones and stuff, like short staccato notes or flutes that fade in.
If you do this, keep in mind the GB Sound hardware has an annoying bug that resets the phase of each waveform on a volume set, meaning you can get scratchy noise in a few emulators and also the real GB.
2. One channel echoes
This works on most speeds. This is useful for when you need a melody on top of some sort of echoing ostinato, or phrase, or whatever.
To illustrate it, I'm going to try illustrating it like this, instead of a tracker layout:
A _ B _ C _ E _ G _ E _ C _ B _
Without 1ch Echo

    +-----+ +-----+ +-----+
A _ B a C b E c G e E g C e B c
+-----+ +-----+ +-----+ +-----+

With 1ch Echo (lowercase notes are the echoes)
Notice how each lowercase letter takes the form of it's 3 step behind louder cousin? That's how the trick works. By having shorter notes that, on each step, has another quieter note that's way behind, you get a cool echoing effect.
I can't explain it very well via text, so I recommend you check out this video by explod2a03 covering how this trick works with a better example and actual audio: https://www.youtube.com/watch?v=6GI9gngTn_Y
The best way to do this in a tracker is to use a channel you're not using temporarily, copy your note sequence to it, delay it by 3 (or however many you need) rows, then right clicking on the selection and clicking “Amplify…", and setting the amplitude to something lower than 50%.
After that, you should have both channels “alternate”. Select the entirety of the channel with the echoes (from top to bottom), go to the channel you want to merge the echoes with, right click, go to “Paste special”, then click “Mix paste” (This should have a shortcut, might want to learn it as it can be fairly useful).
3. Quick volume envelopes
Are you in a hurry? No problem, this simple trick will create linear envelopes:
- Select two volume / C values of two separate notes (within the same channel), and everything in between
- Right click and hover over “Interpolate”
- Click on “Effect column”
- You're done!
You might wonder how's it going to sound in-game; well, it'll sound as close as possible. The volumes it can't play it'll just clamp it to the nearest ones it can play.
Frequently Asked Questions
Q: Can I use mp3/wav files?
A: No, but you can use .midi files. If you're looking for an easy way to add music to your game, you can ask the #collaborations channel of the GB Studio Discord or browse the GB Studio Community Assets.
This has limited success, and there are easier options to get music in your game, such as the
Q: How do I convert a .midi file to .mod?
A: OpenMPT can open MIDI files and save the result to .mod Some resources on how to do this include a video tutorial as well as Kazy's write-up article pinned in the #music-help section of the GB Studio discord.
Q: Can I use this .mod file I found online?
A: It won't sound as intended, but it can be made to sound good-enough with some adjustments. Any === notes need to be replaced with the EC1 effect. All instrument restrictions should apply, and no melodic instruments should be using Channel 4. You may also need to transpose the notes of a channel to account for differently-tuned samples, which you can learn more about in your tracker's documentation.
Q: How do I stop a note from playing?
A: EC1 will mute a channel's note, C00 will mute the channel until it recieves another Cxx effect.
Q: What do I do if my song sounds completely giltched-out?
A: It's probably corrupted. It can likely be saved by using OpenMPT and saving it as a different filetype. If you're using MilkyTracker, don't press “Save” on a .mod file, always work in a .xm file instead.
Q: Why is my song speed is faster in-game than it is in the tracker?
A: If you're using an Fxx effect with a value lower than F05, add F96 to the first row of your song. This will not impact your in-game playback speed.
Q: Can I play back voice clips/sound effects?
A: Not on GBT Player. Pokemon Yellow's method is unique, and LSDj does not leave much processing power for games to be played while it's running.
Q: Can I use a different tool to write my music?
A: If the tool can natively export to .mod, try it!
Q: Why is my song playing glitched sounds when it tries to loop?
A: D00 is a problematic effect, try using Bxx instead. If you're already using Bxx, make sure the xx number does not go above the number of pattern-slots in your song. A song's first pattern is always in slot 00.
Q: Why do some notes in OpenMPT appear red and sound higher/lower than they're supposed to sound?
A: Go over to the “General” tab that's under the New File, Open and Save buttons. Click the big button next to the “Name” field that says “MOD (ProTracker), 4 channels”. Once there, disable both ProTracker 1/2 Mode (MOD) and Amiga Frequency Limits. This is a thing because the format here is meant to be used with the Amiga line of computers (that's where it was made), which has frequency limits.
Q: Why does my song start out with garbage noise?
A: If your song doesn't start using the first two channels, add a note to their first row with a C00 effect on each.
Q: Can I play sound effects?
A: Yes, with limitations. View the next page of the documentation for more information. Playing sound effects will not interrupt the song being played by GBT Player.
Tips
- Make sure you save frequently and also back-up your files. This is important in anything that you do and it's worth mentioning here.
- If you're stuck, please ask for help in the Discord server, in
#music-help. There's usually a few handful of people who are willing to help out at most times. - Frequently try out your music in your game. Things don't sound 1:1, and the built in preview just plays the .mod file rather than building the music and previewing that.
- Keep it simple! Don't jump into this, trying to emulate what several artists have done with LSDj or whatever other tools, you'll just get stuck.
- Don't be afraid of failure. I get this is kind of an unfitting tip, but it's important. Your first song won't be good, and that's okay. You'll fail, sure, but you'll also gain knowledge on what you might've done wrong, or how you want to go on about with your next endeavor.
- OpenMPT has a manual to help you get started. Here's a link, give it a read if you're stuck (or just ask for help)
- Give the GBT Player documentation a read.
Sound Effects
New in 1.2.0
Sound effects can be added to your game using the Sound: Play Effect event in your Actor, Trigger or Scene scripts.
You can choose from playing a beep with a given pitch, a tone with a given frequency or cymbal crash.
Using Custom Events you can combine multiple effects into a single reusable event to make jingles.
Building Your Game
Play
Clicking the Play button in the top right of the Project Editor window will start a build of your game and once complete will open a new window where you can play your game. See Keyboard Shortcuts for details on how to play your game in the Play Window.
Build Terminal
Clicking the Project Navigator and selecting Build & Run will take you to the Build Terminal where you can see a log of the project build. You also get to this screen by clicking the Play button while a build is taking place. This screen will show you if there's any errors in your build to help you correct them.
Build as ROM
Clicking the Export button and clicking Export ROM will build your game and create a ROM file in your project's build folder as $PROJECT_ROOT/build/rom/game.gb. You can play this ROM file in any compatible emulator such as OpenEMU or KiGB.
Build and deploy for Web
Clicking the Export button and clicking Export Web will build your game and create a HTML5 web build in the folder $PROJECT_ROOT/build/web. You can upload this folder to any web server and navigate to the index.html file to play your game in a web browser. If you use a mobile or tablet web browser the game will also include touch controls.
If you zip the build/web folder you can upload it to Itch.io as a HTML game. In this case the recommended viewport size to use is 480px x 432px.
Troubleshooting
On macOS if you're having trouble building or running your game you may also need to install Apple's Command Line Tools by opening Applications/Terminal.app and entering the following command.
xcode-select --install
On Windows you may need to whitelist the application in your Anti Virus software to perform a build.
Settings
New in 1.2.0
Clicking the Project Navigator and selecting Settings will take you to a list of your project's settings.
GB Color Options
GB Studio has some limited support for GB Color when your game is run on compatible hardware or emulators. There are two options currently available:
-
Use Double Speed Mode - When enabled allows the game engine to make full use of the GB Color's increased CPU speed. Enabling this option helps prevent music skipping when transitioning between scenes.
-
Use Custom Color Palette - When enabled allows the four colors in your game's color palette to be replaced. Click on the color you wish to replace then choose the red, green and blue values to use or enter a hex color value and click Convert Hex to match the closest available color.


Using a custom color palette you can create a drastically different tone for your game! Try experimenting to see what you can come up with. If you don't like your color palette you can always click Restore Default to the get the original palette back again.

Controls
The Controls section allows you to override the default controls used when playing your game from a web build and the Play Window.
To edit the controls for a button click on the input box and while the input is highlighted type the key you wish to assign. To remove all the assigned keys click the input and then press the Backspace key on your keyboard.
To reset to the original controls you can use the Restore Default button.

Cartridge Type
The Cartridge Type section allows you to choose which Memory Bank Controller you want to use and if a battery will be included when exporting your game to a physical cartridge (requires additional hardware and software).
If you don't know what these settings mean it's best to keep this as the default of MBC5+RAM+BATTERY which you can do by using the Restore Default button.
Custom HTML Header
You can use the Custom HTML Header section to add content to the HTML <head> when generating a web build of your game. You can use this to add any custom CSS or Javascript you want to the web build HTML page.